Amazon SES
On this page
Mailcoach supports sending through Amazon SES. New SES accounts are sandboxed and can send only to verified recipients until AWS approves production access. Open your account menu, then Settings → Mailers, and create a mailer for the “SES” email service.
Follow the setup wizard. It asks for an Access Key ID and Secret Access Key: credentials that let Mailcoach configure and use your AWS account’s email service.
How to create an Access Key ID and Secret Access Key#
First, log in to your account at AWS.
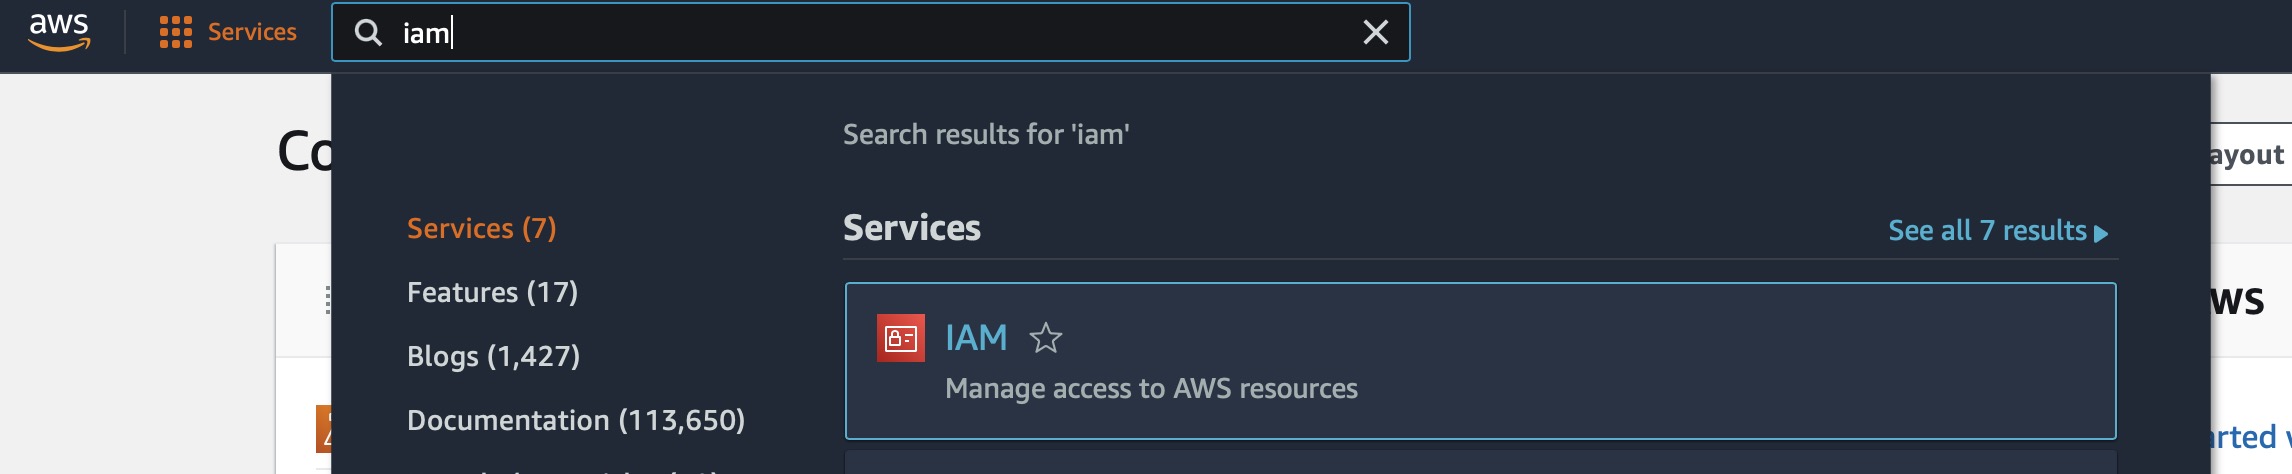
Next, search for the IAM service.
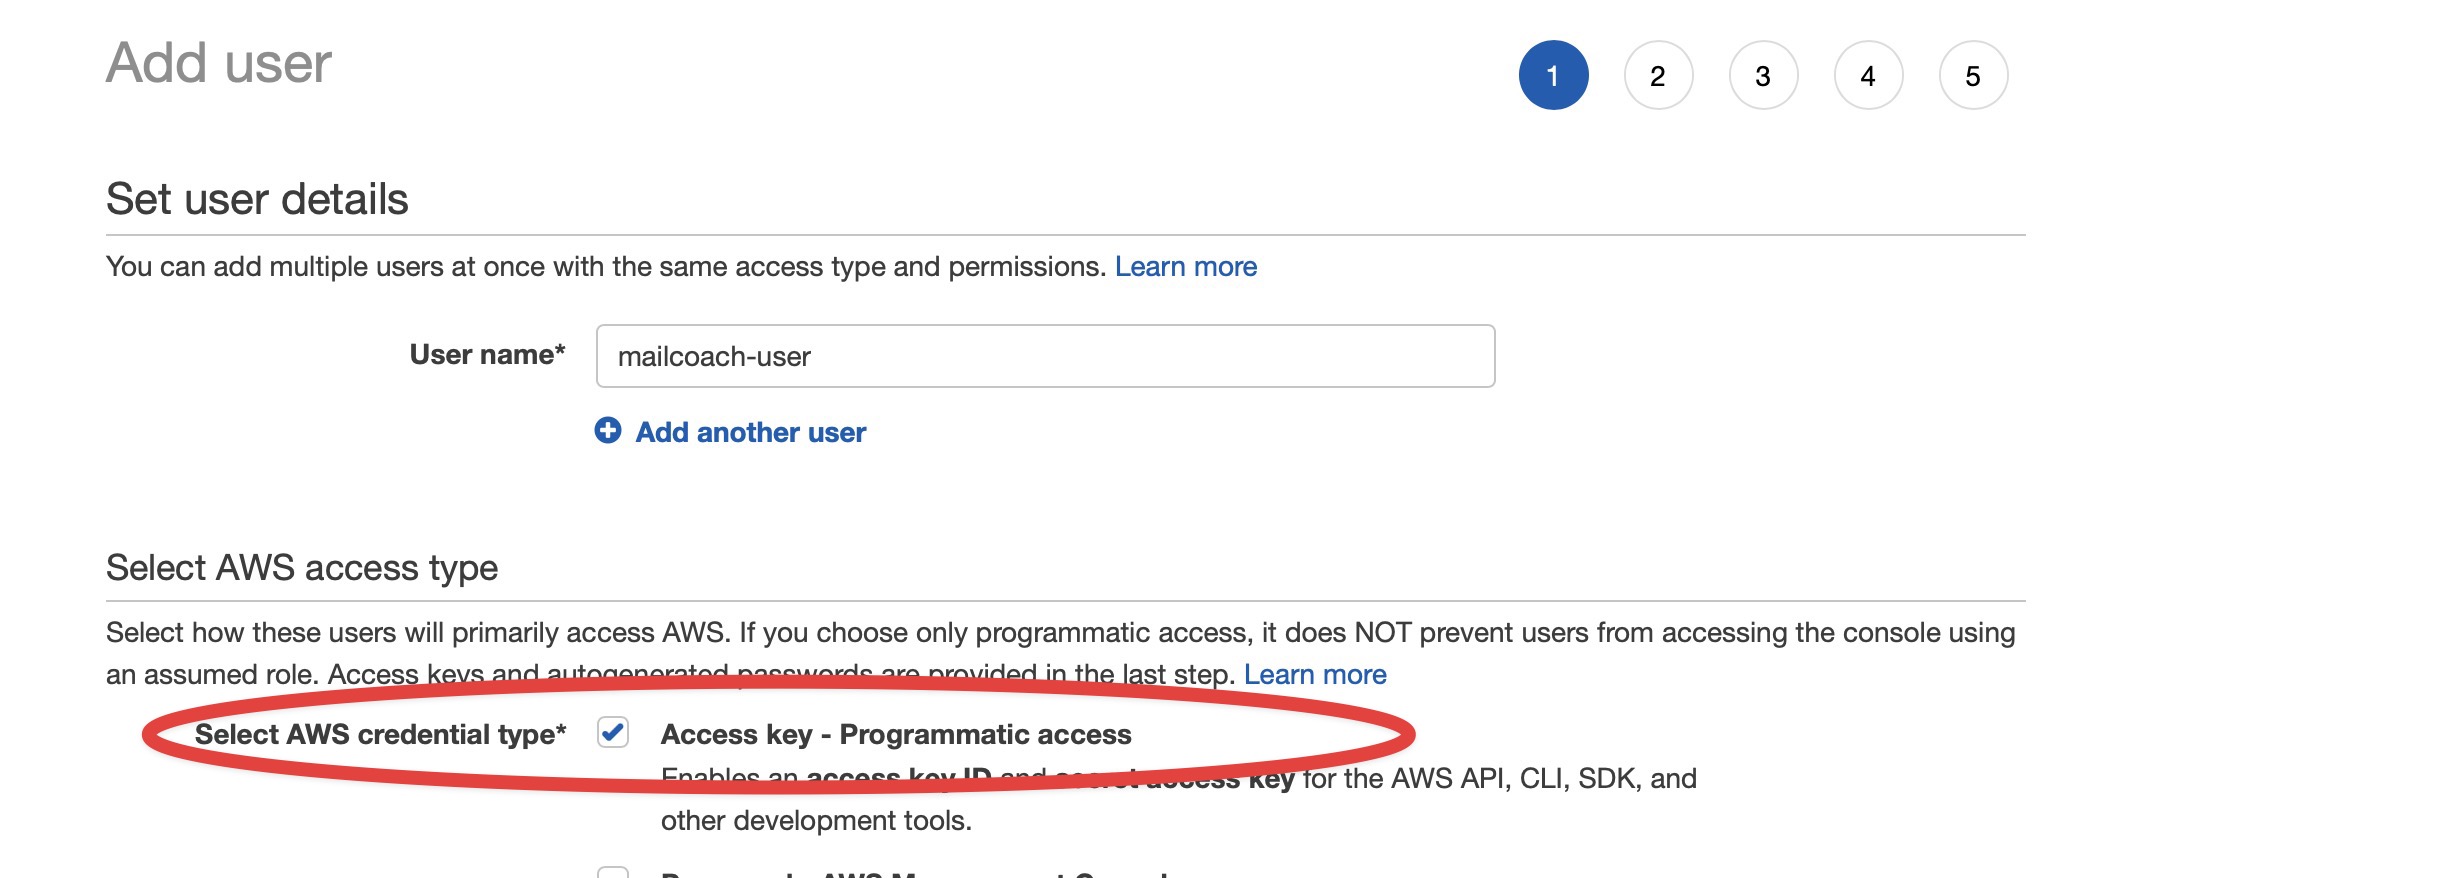
There, go to the “Users” section and create a new user.
On the next screen, give the user a name.
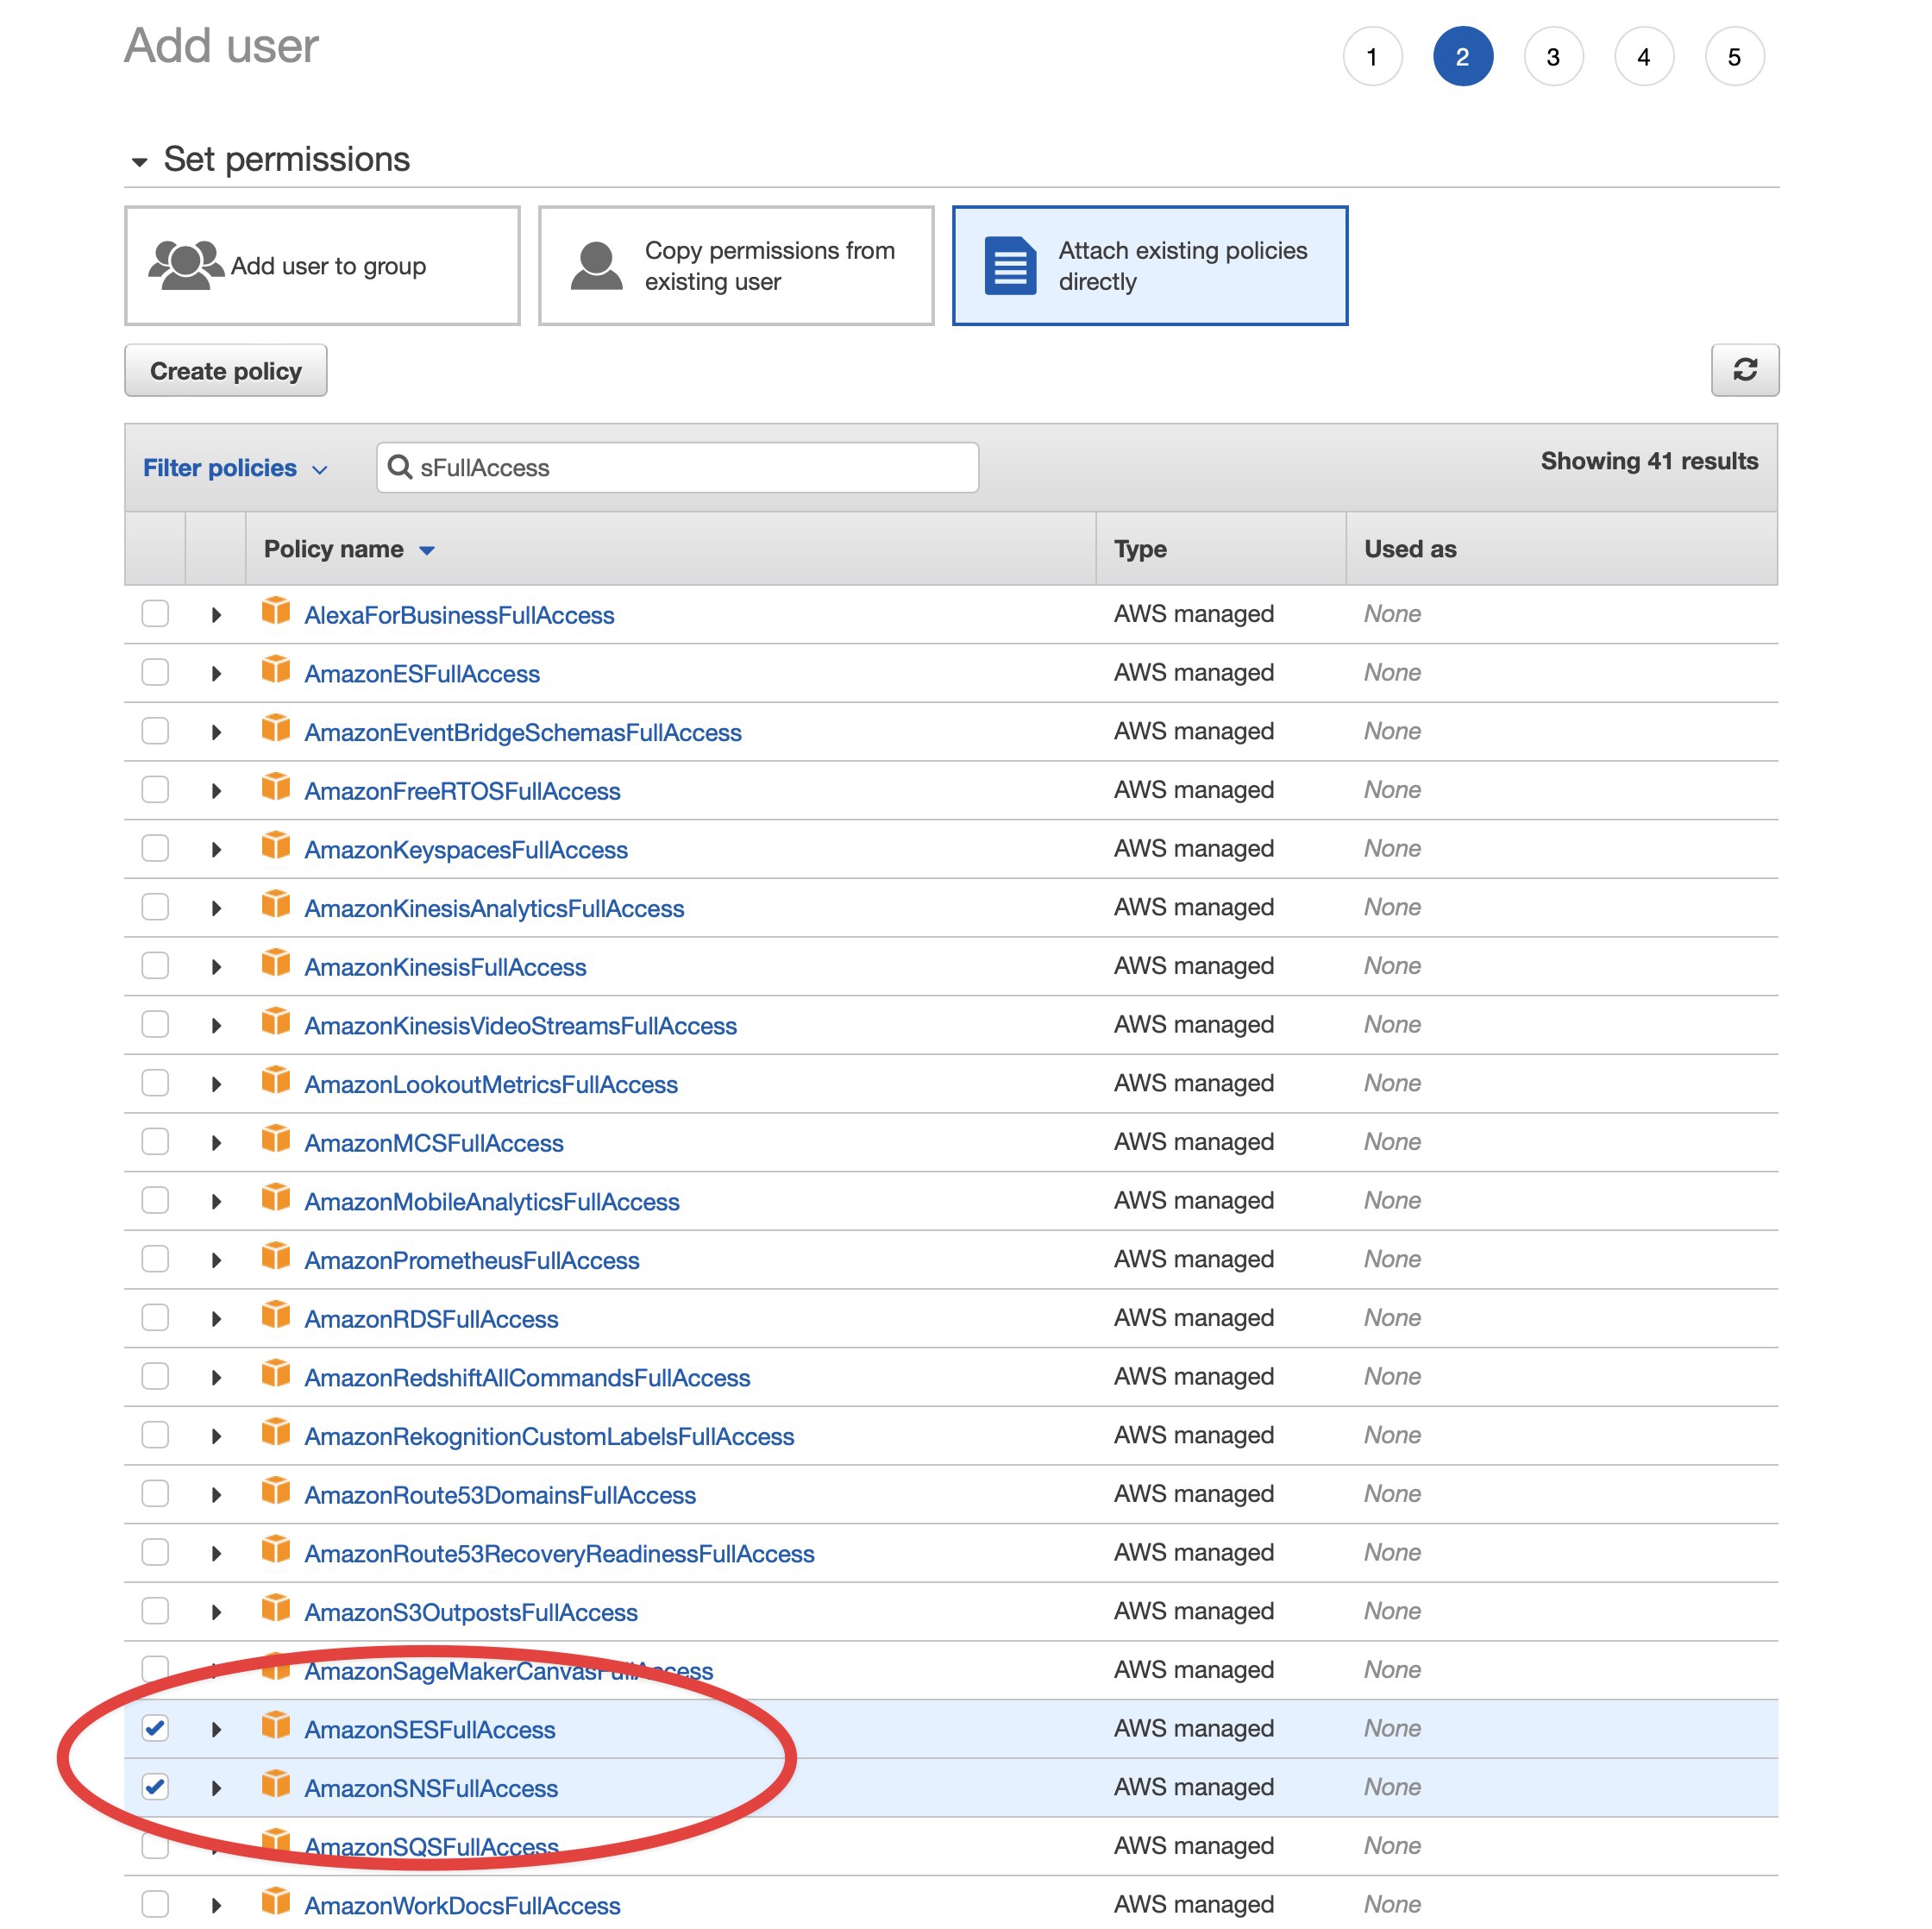
For permissions, select “AmazonSESFullAccess” and “AmazonSNSFullAccess”.
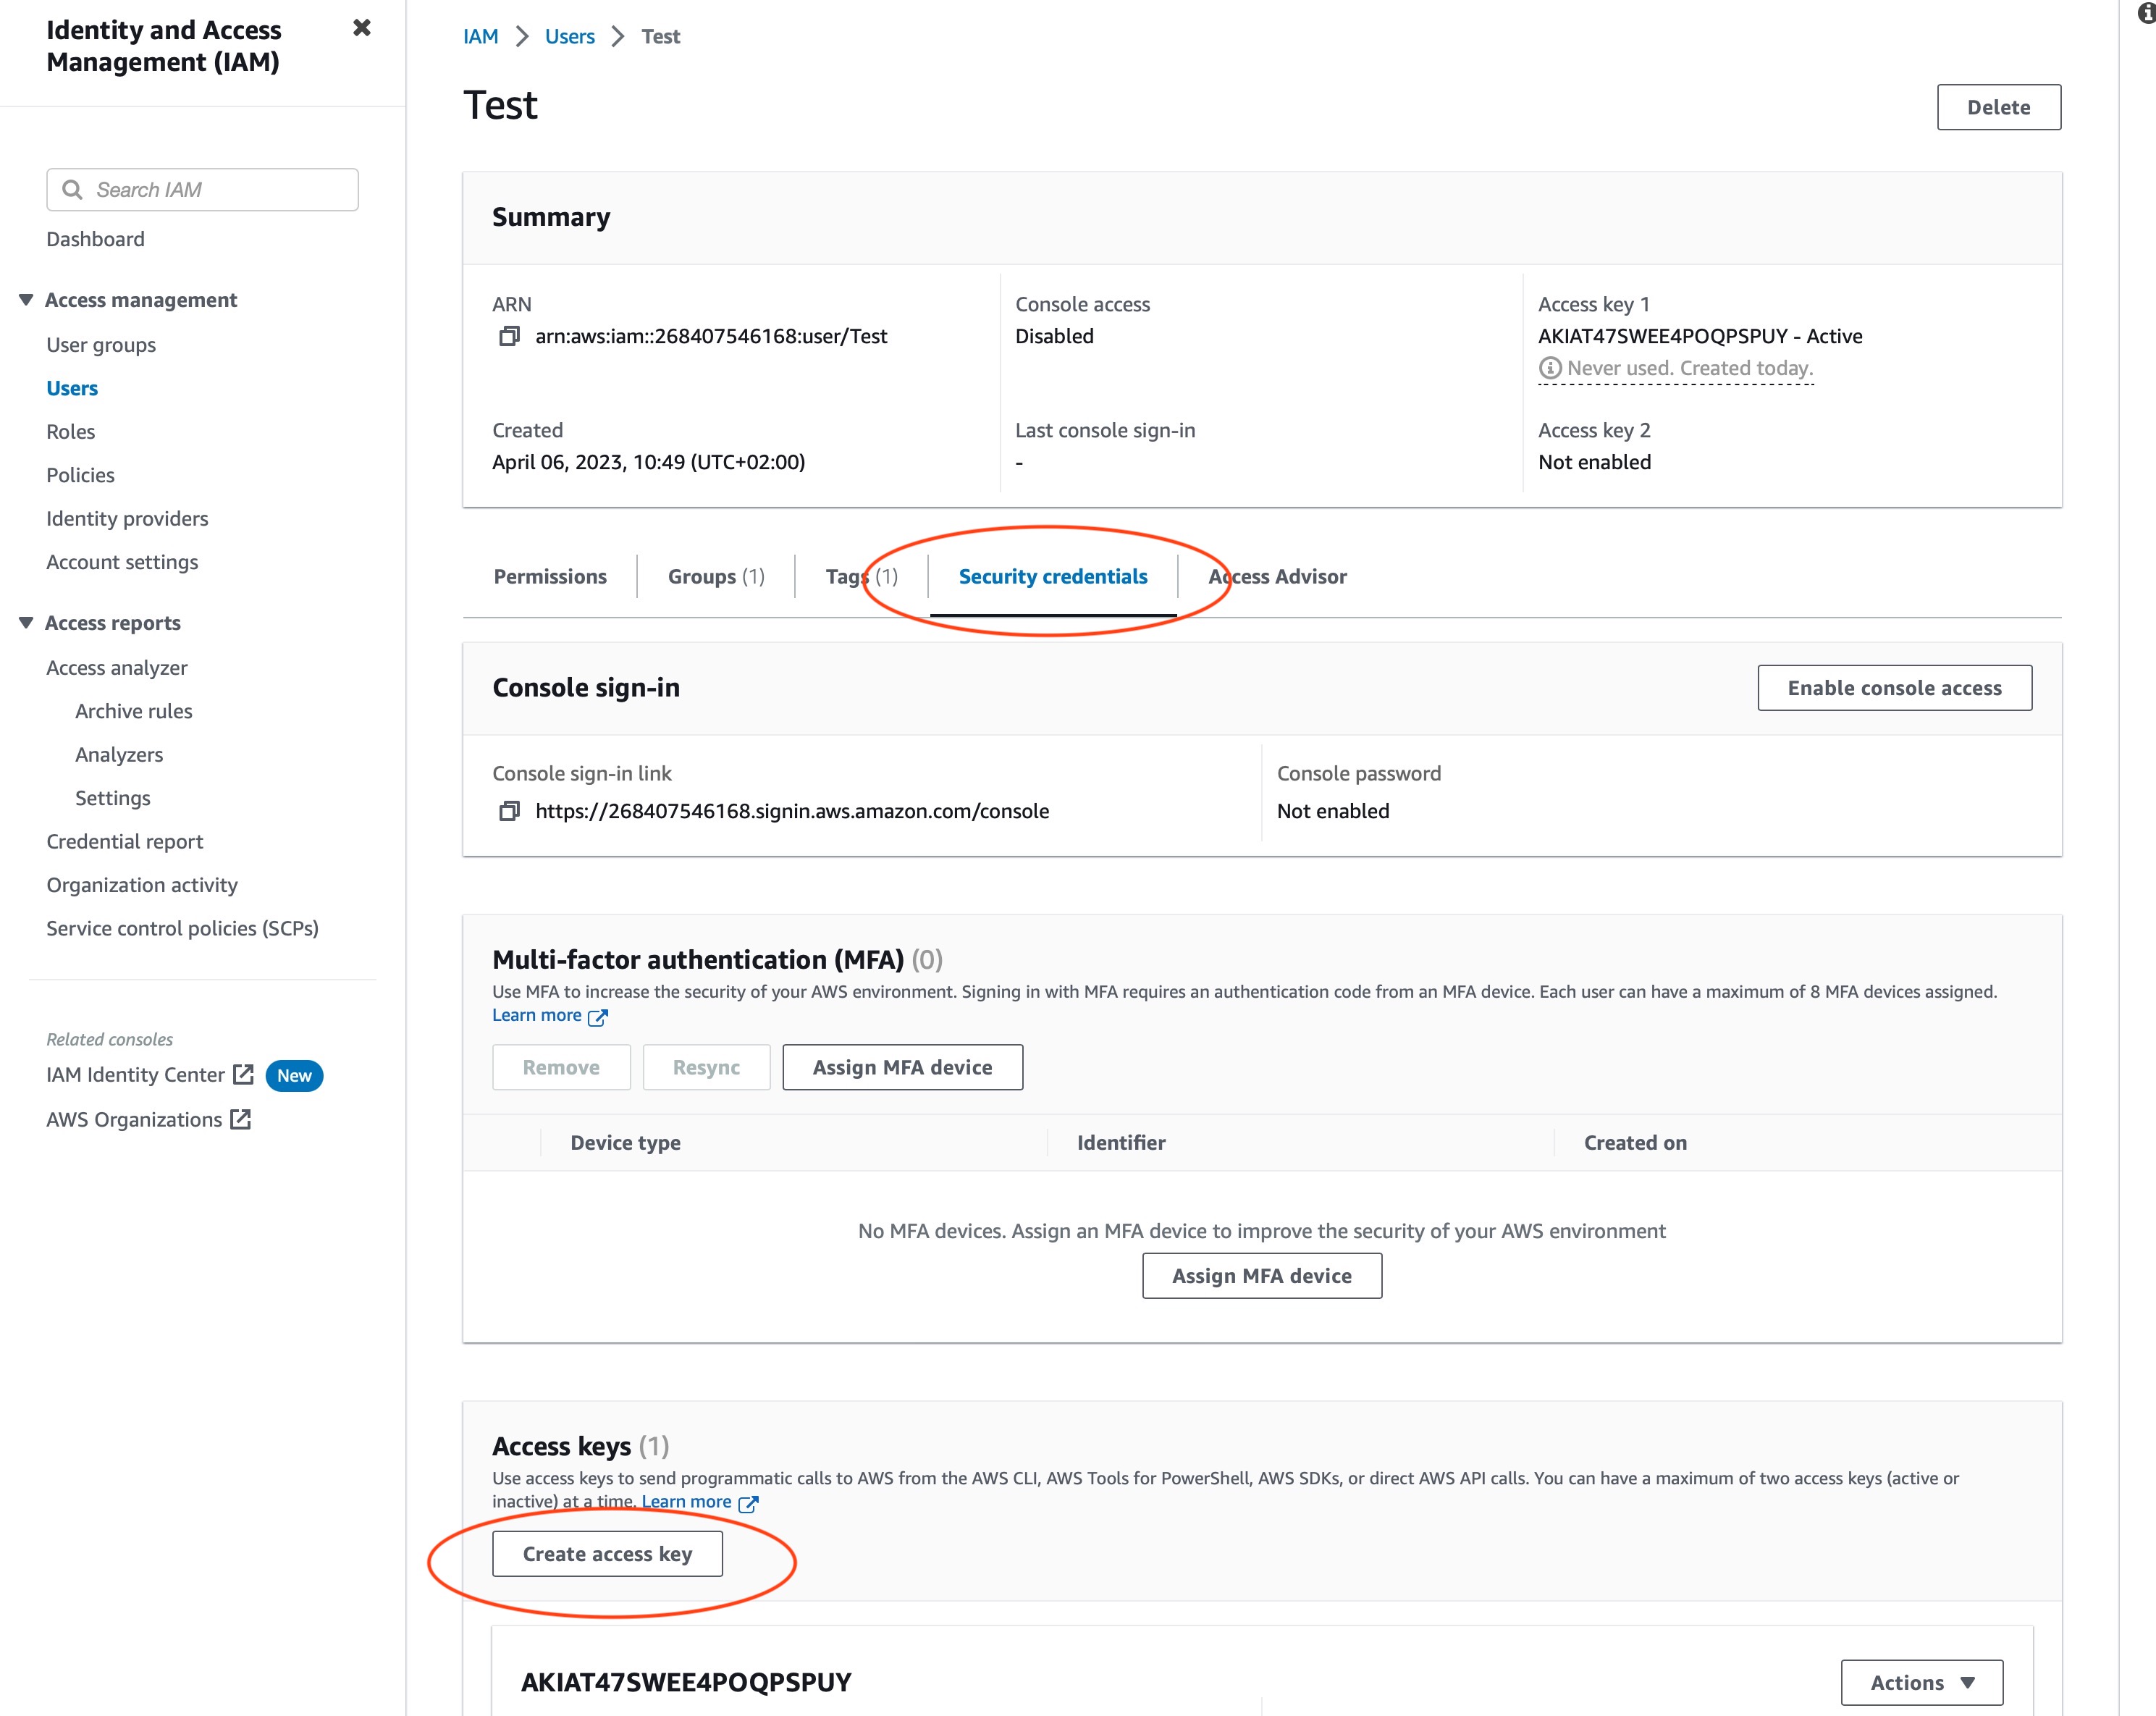
Next, click on the newly created user and go to the “Security credentials” tab. There, click on “Create access key”.
On the next screen, select “Third-party service”.
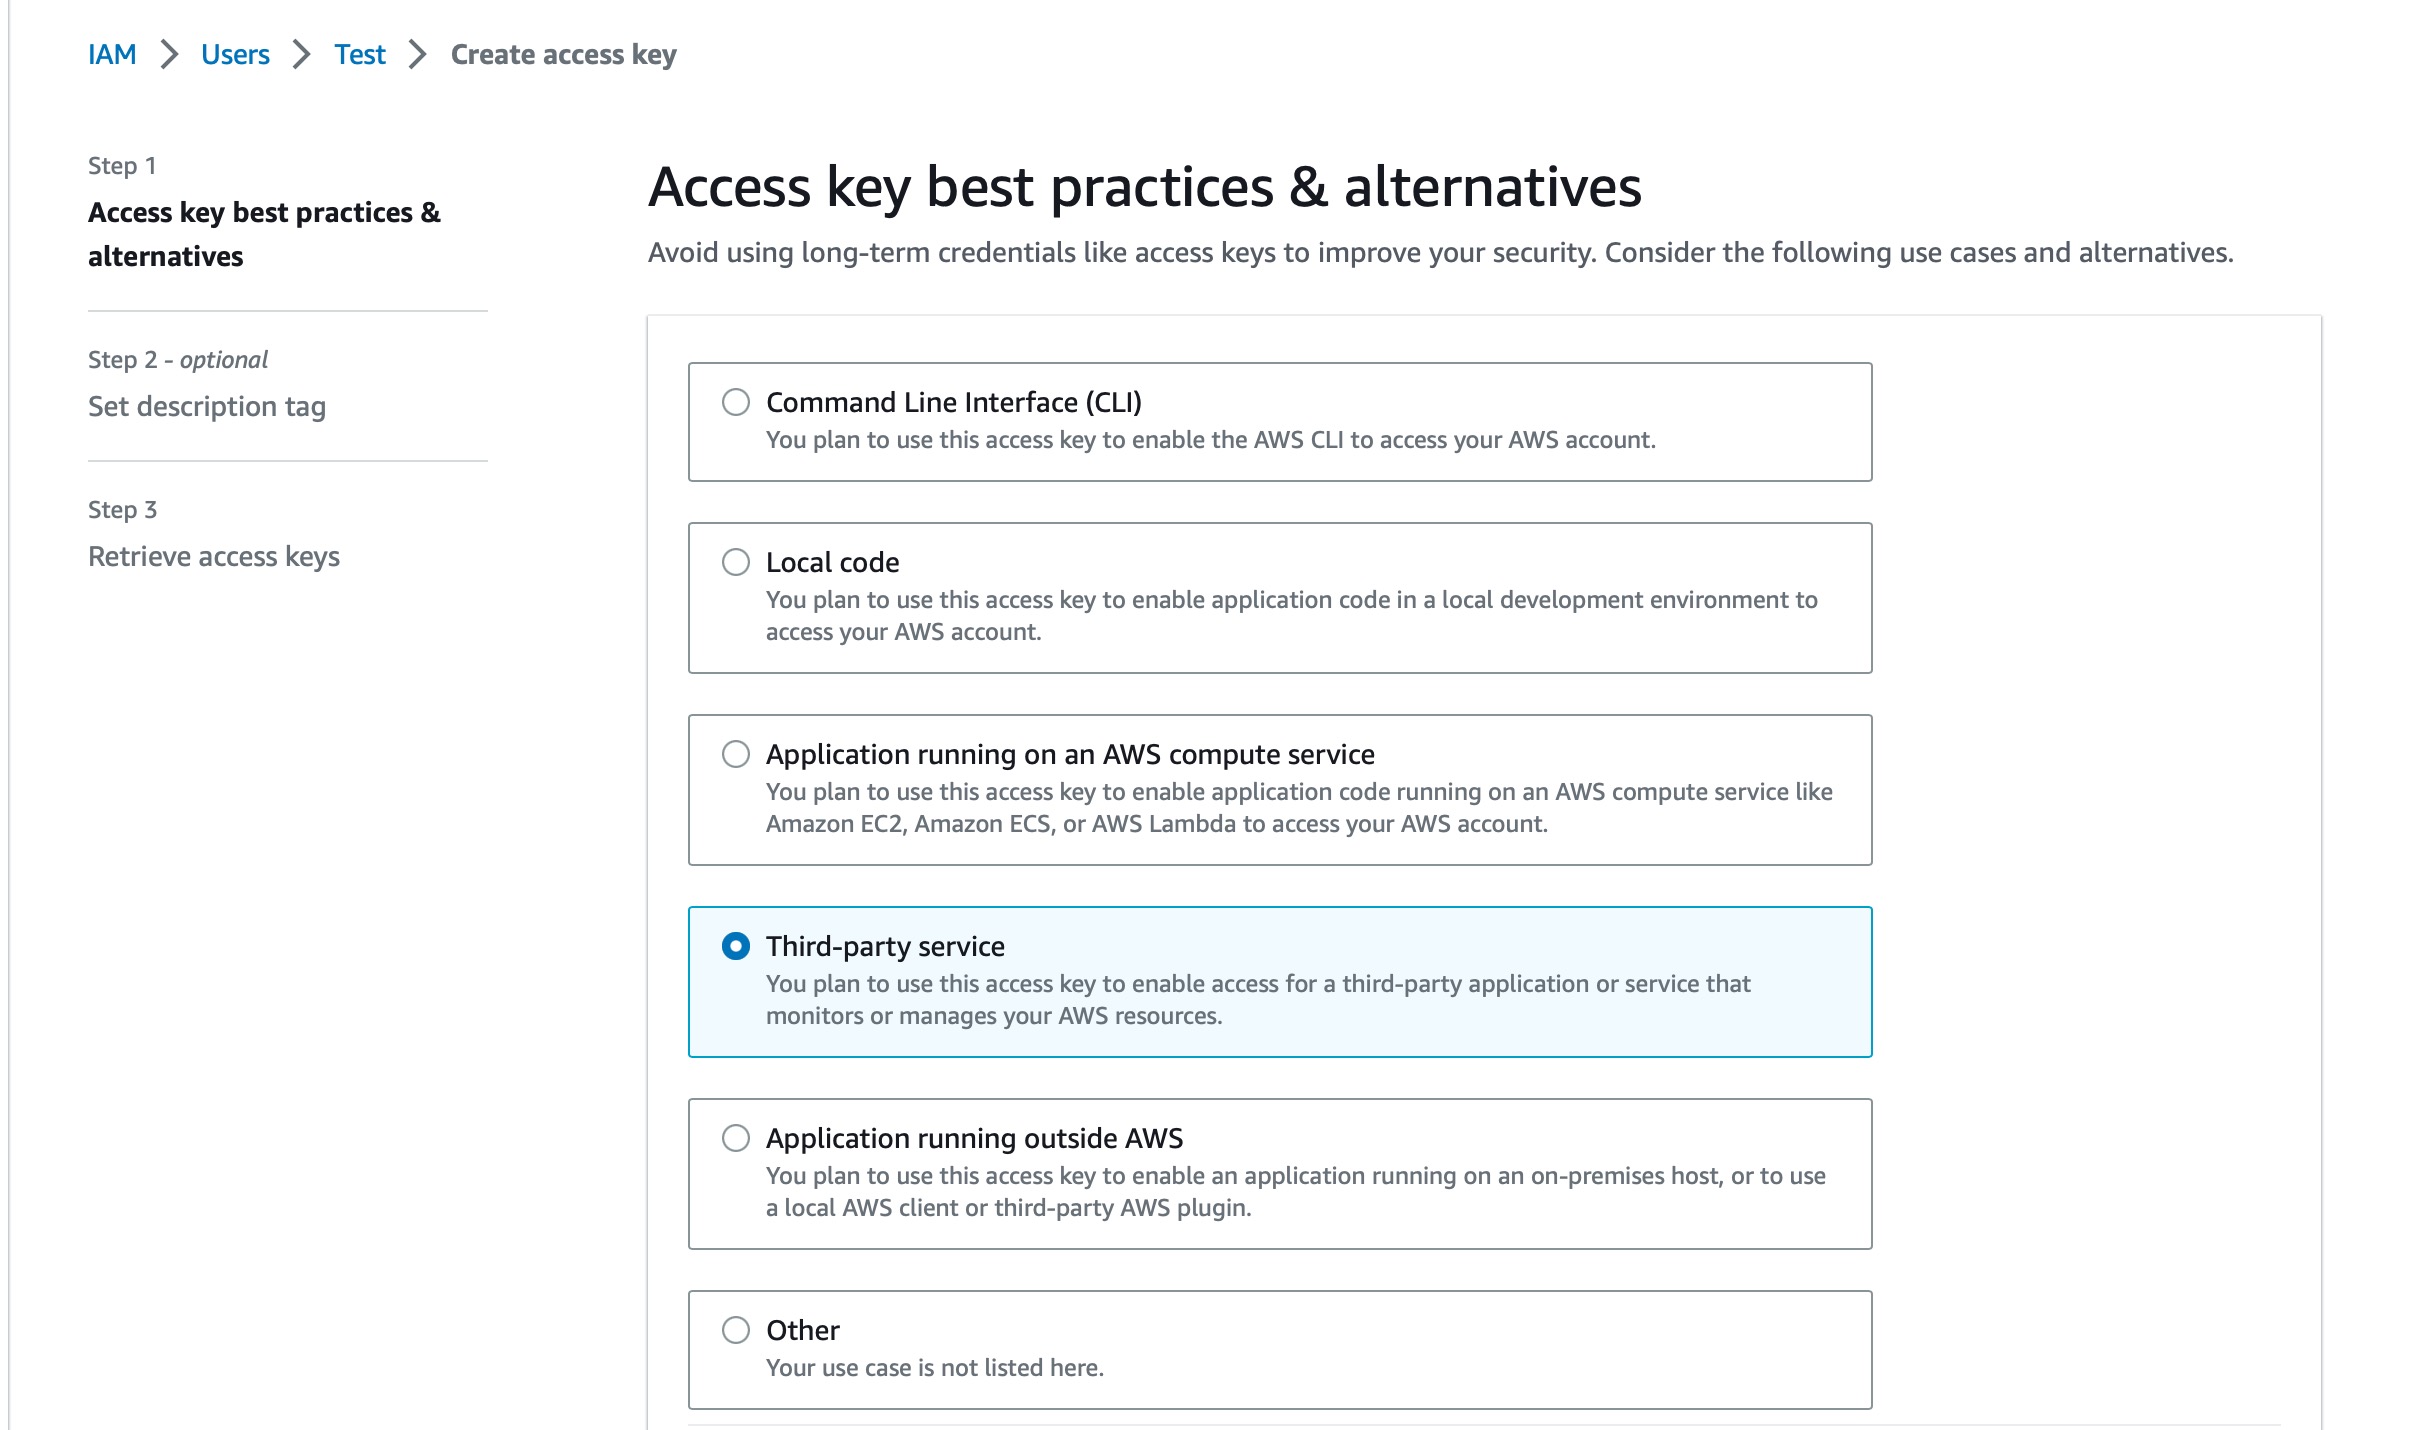
AWS displays the Access Key ID and Secret Access Key.
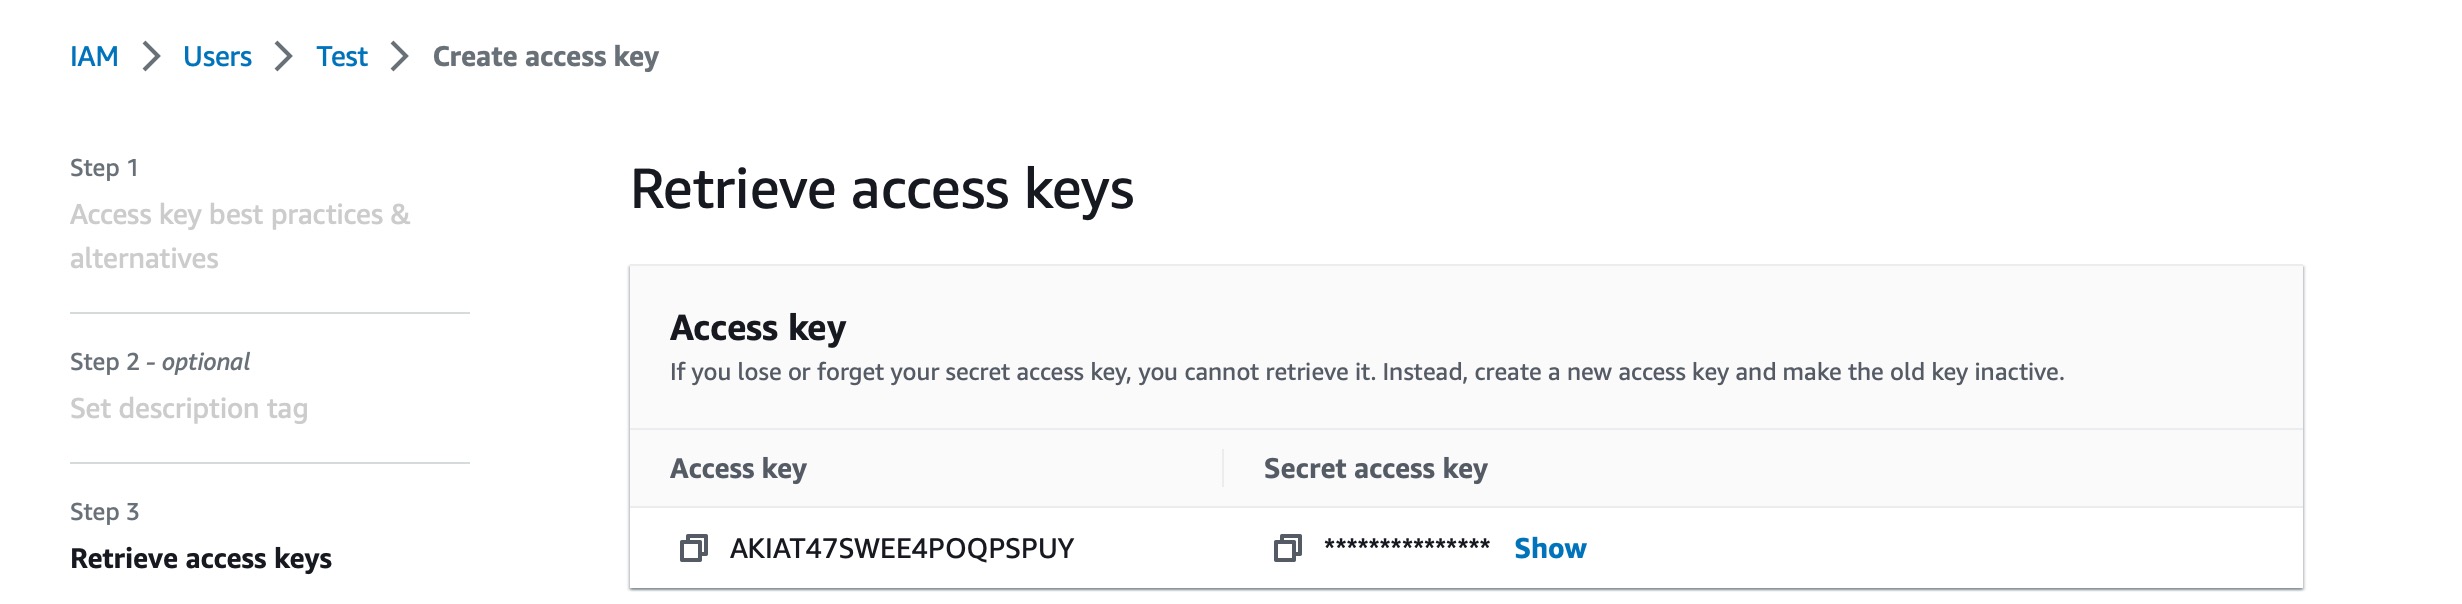
The screenshot below shows the AWS user-creation confirmation screen, not Mailcoach. Copy your Access Key ID and Secret Access Key into the corresponding fields in the Mailcoach wizard, then follow its remaining steps.
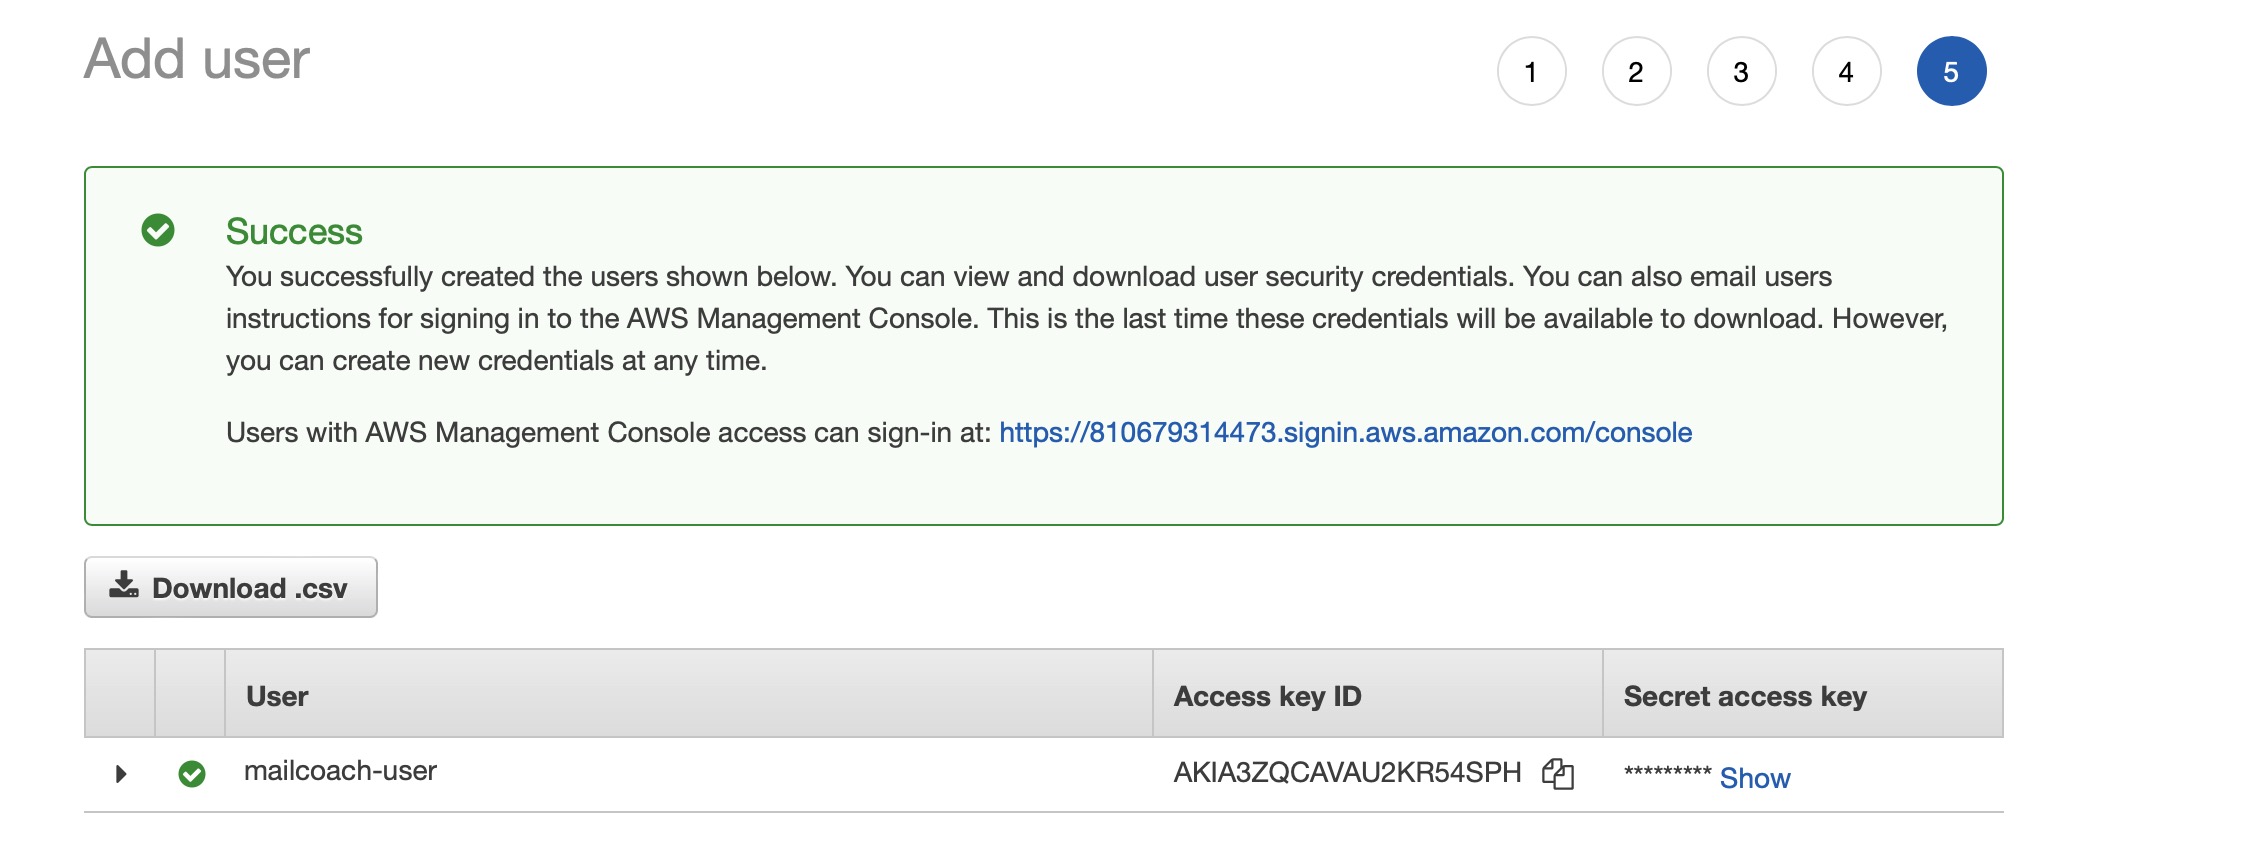
Continue the Mailcoach wizard to finish configuring SES.
Manual configuration of Amazon SES#
Create an SES Configuration Set so Mailcoach can track bounced messages.
Open your AWS Dashboard and make sure you still have the same AWS region selected as where you verified your domain and sending email address. Go to the Simple Email Service under Services, and find the Configuration Sets menu item under Email Sending. Press the Create Configuration Set button:
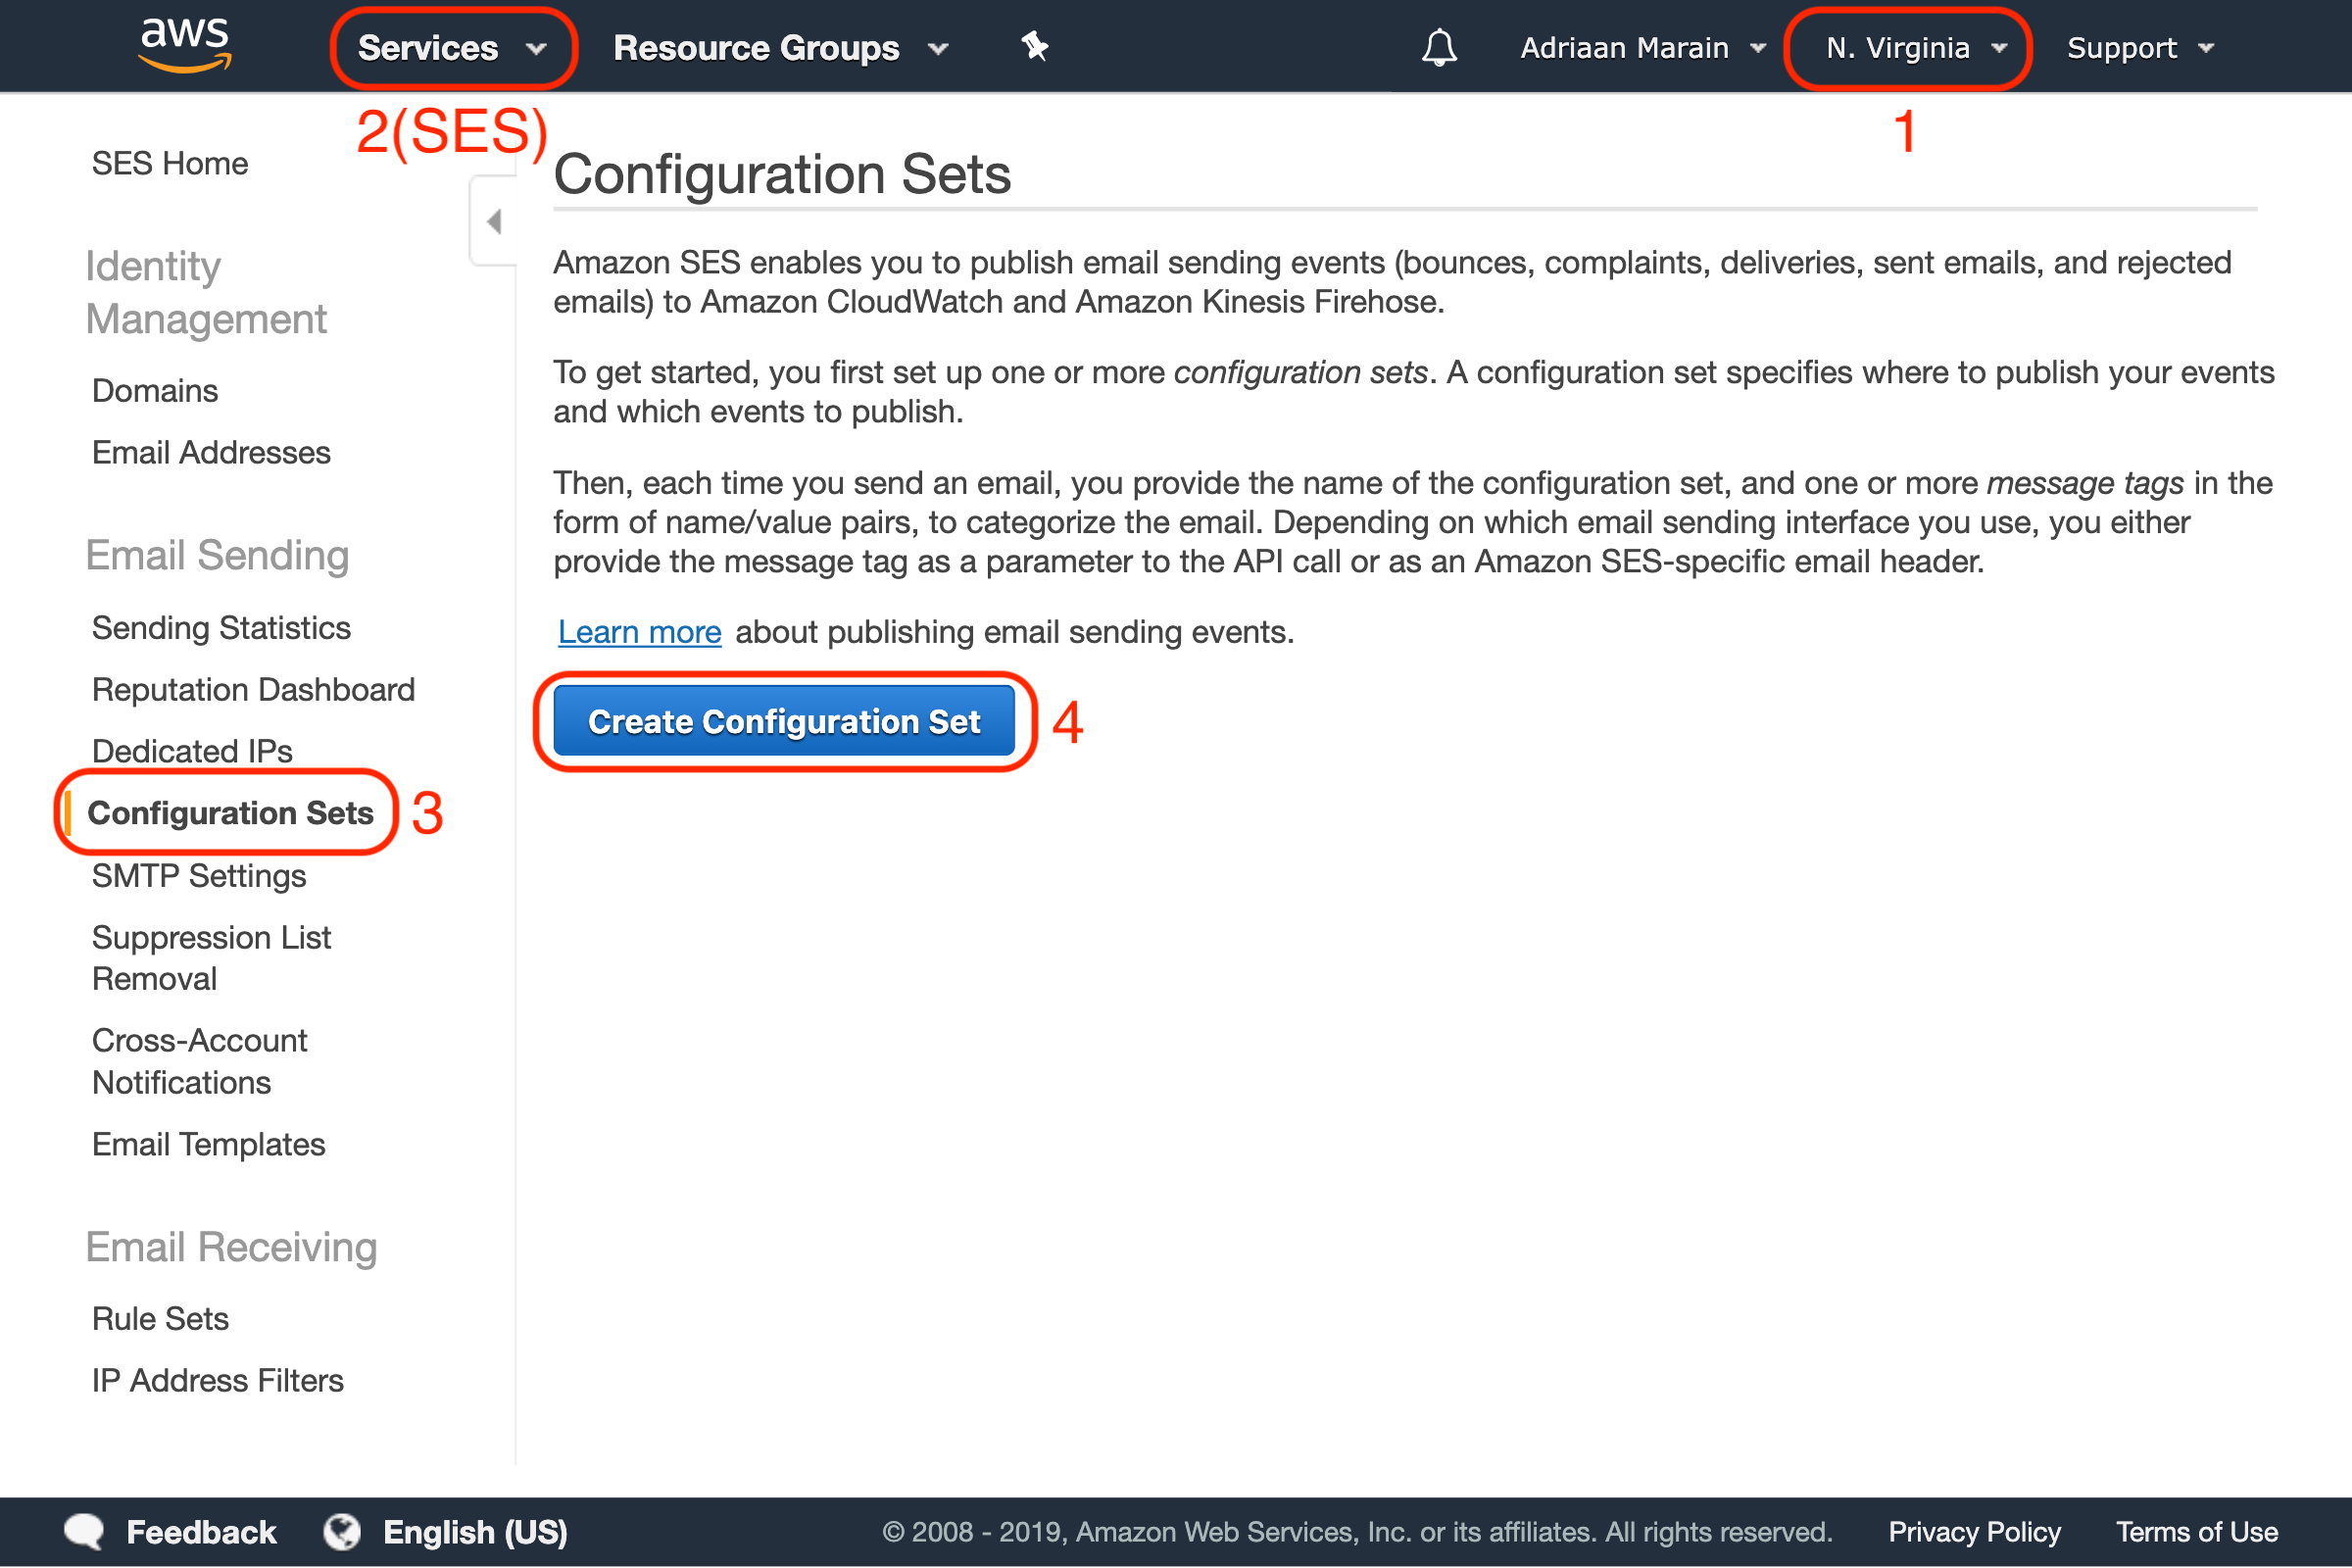
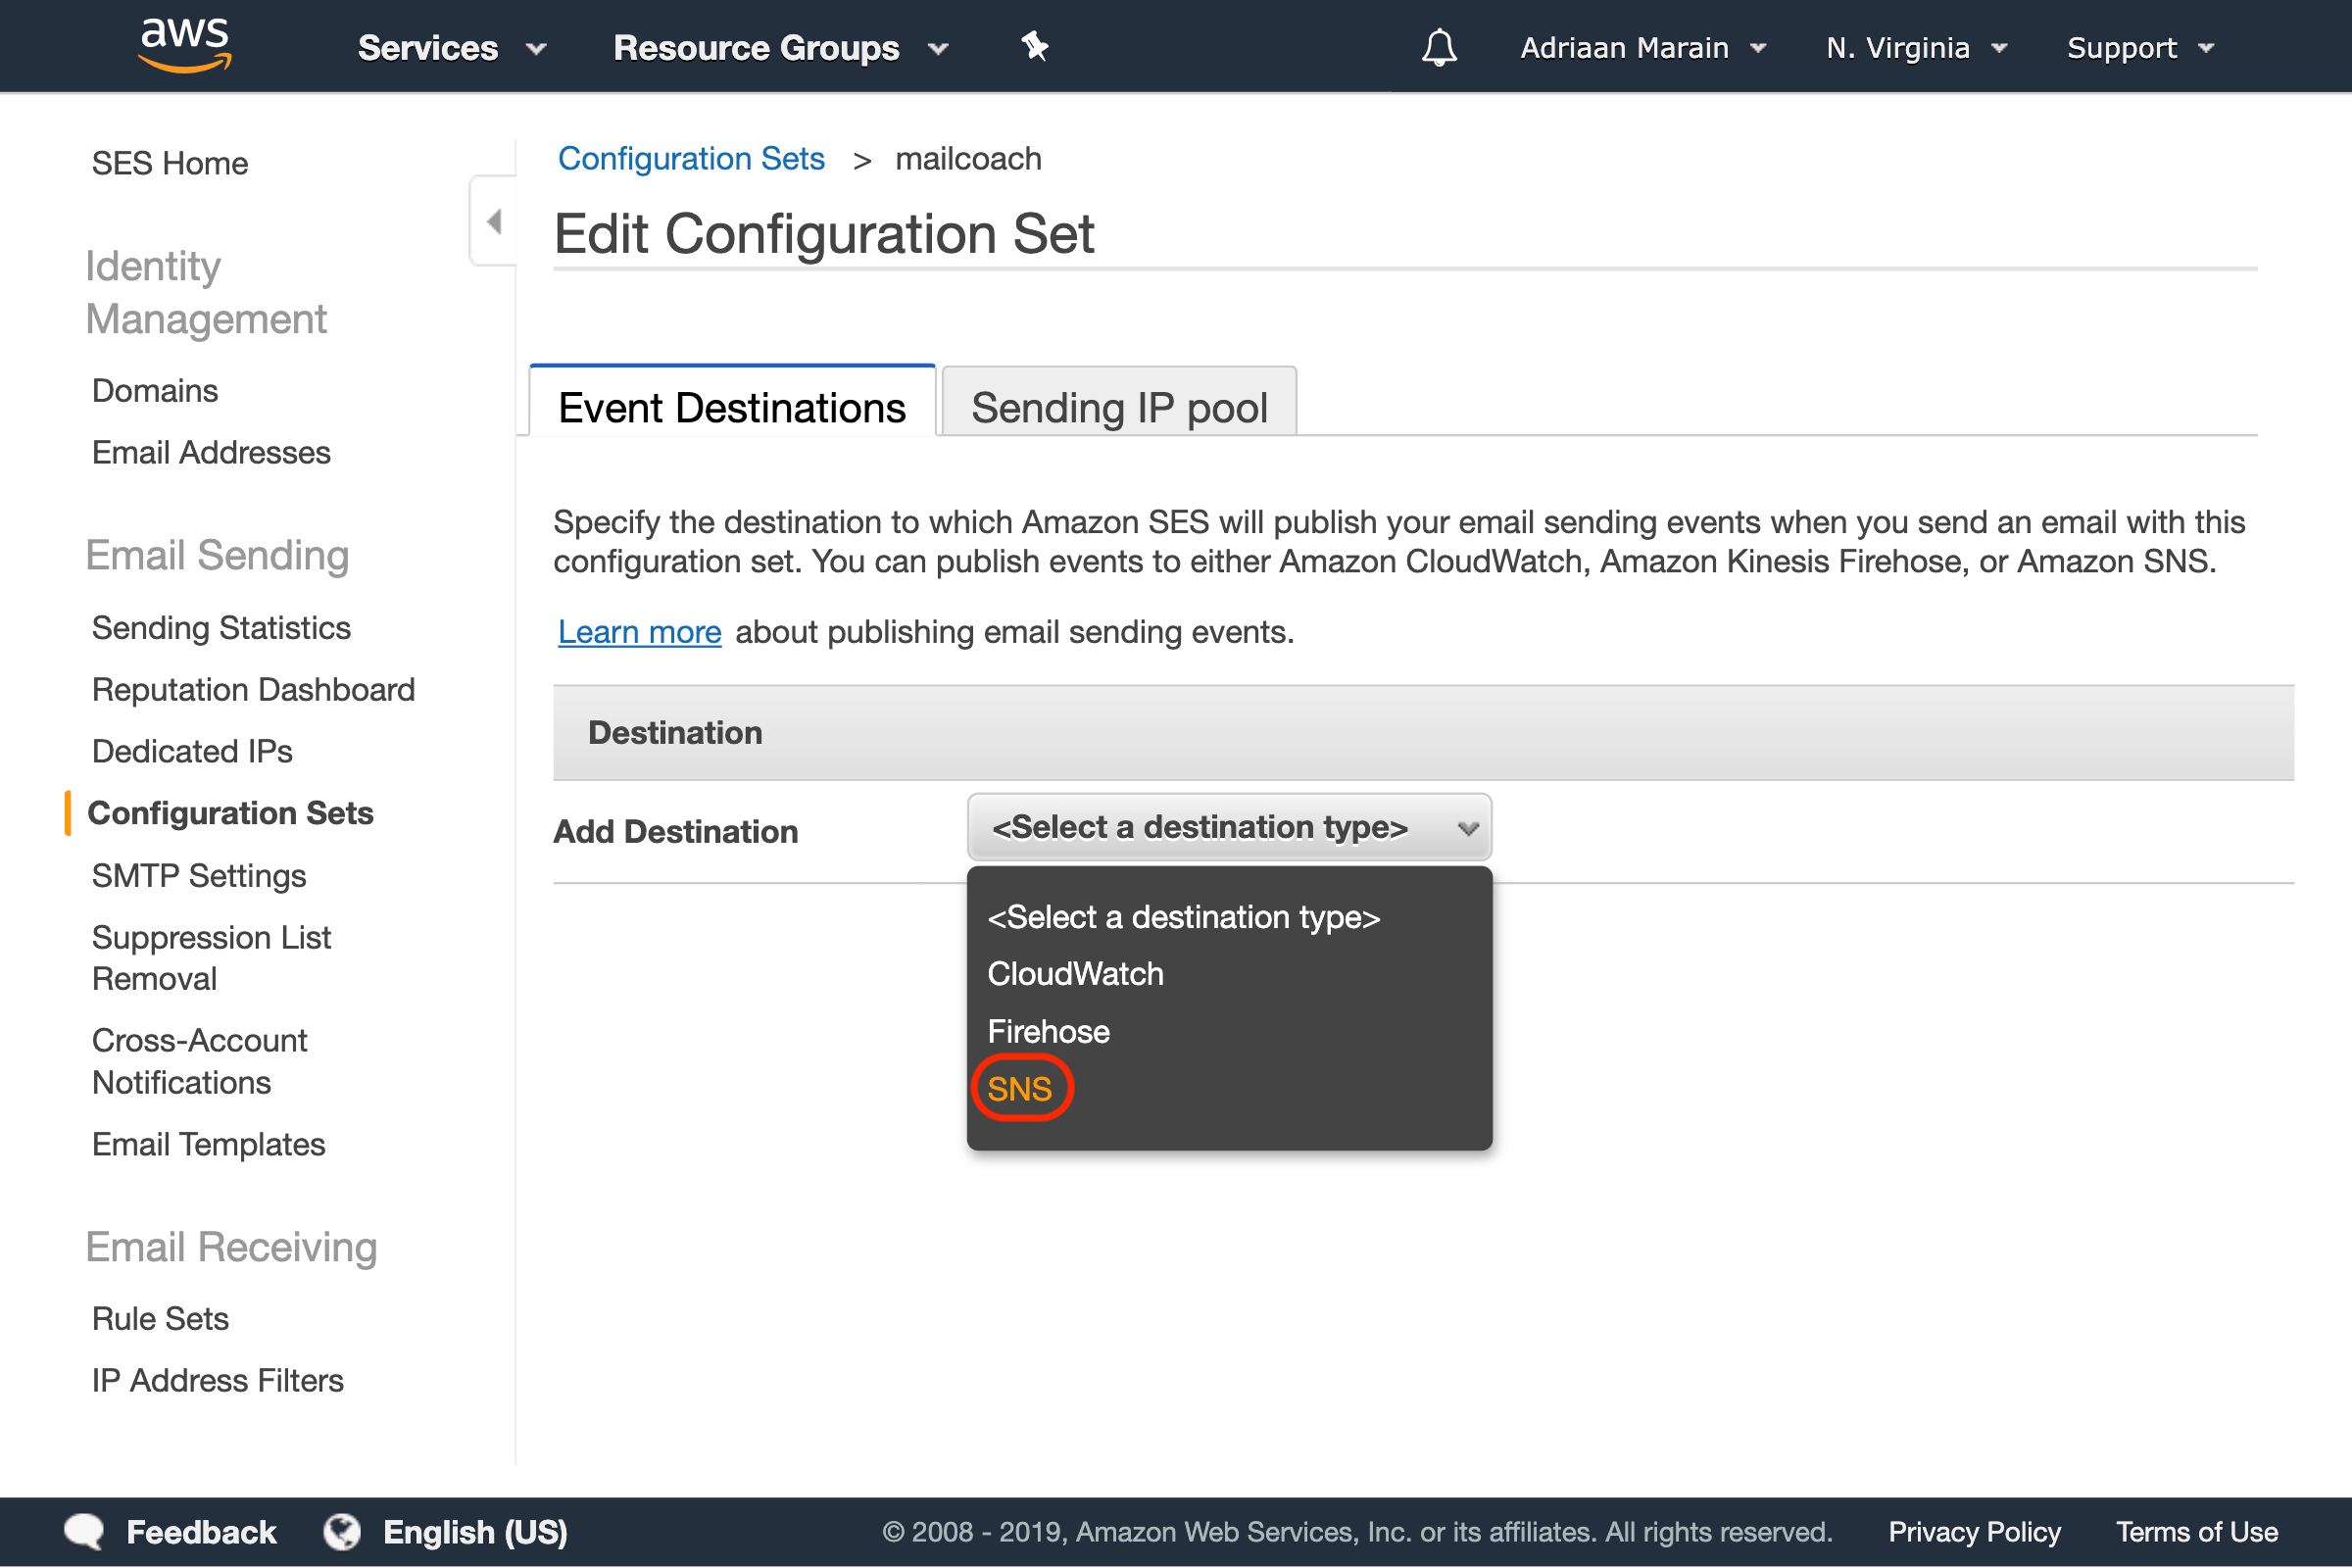
Choose a name for your configuration set and create it, then click the newly created item in the list to add some events destinations. Click the Select a destination type dropdown and select the SNS option:
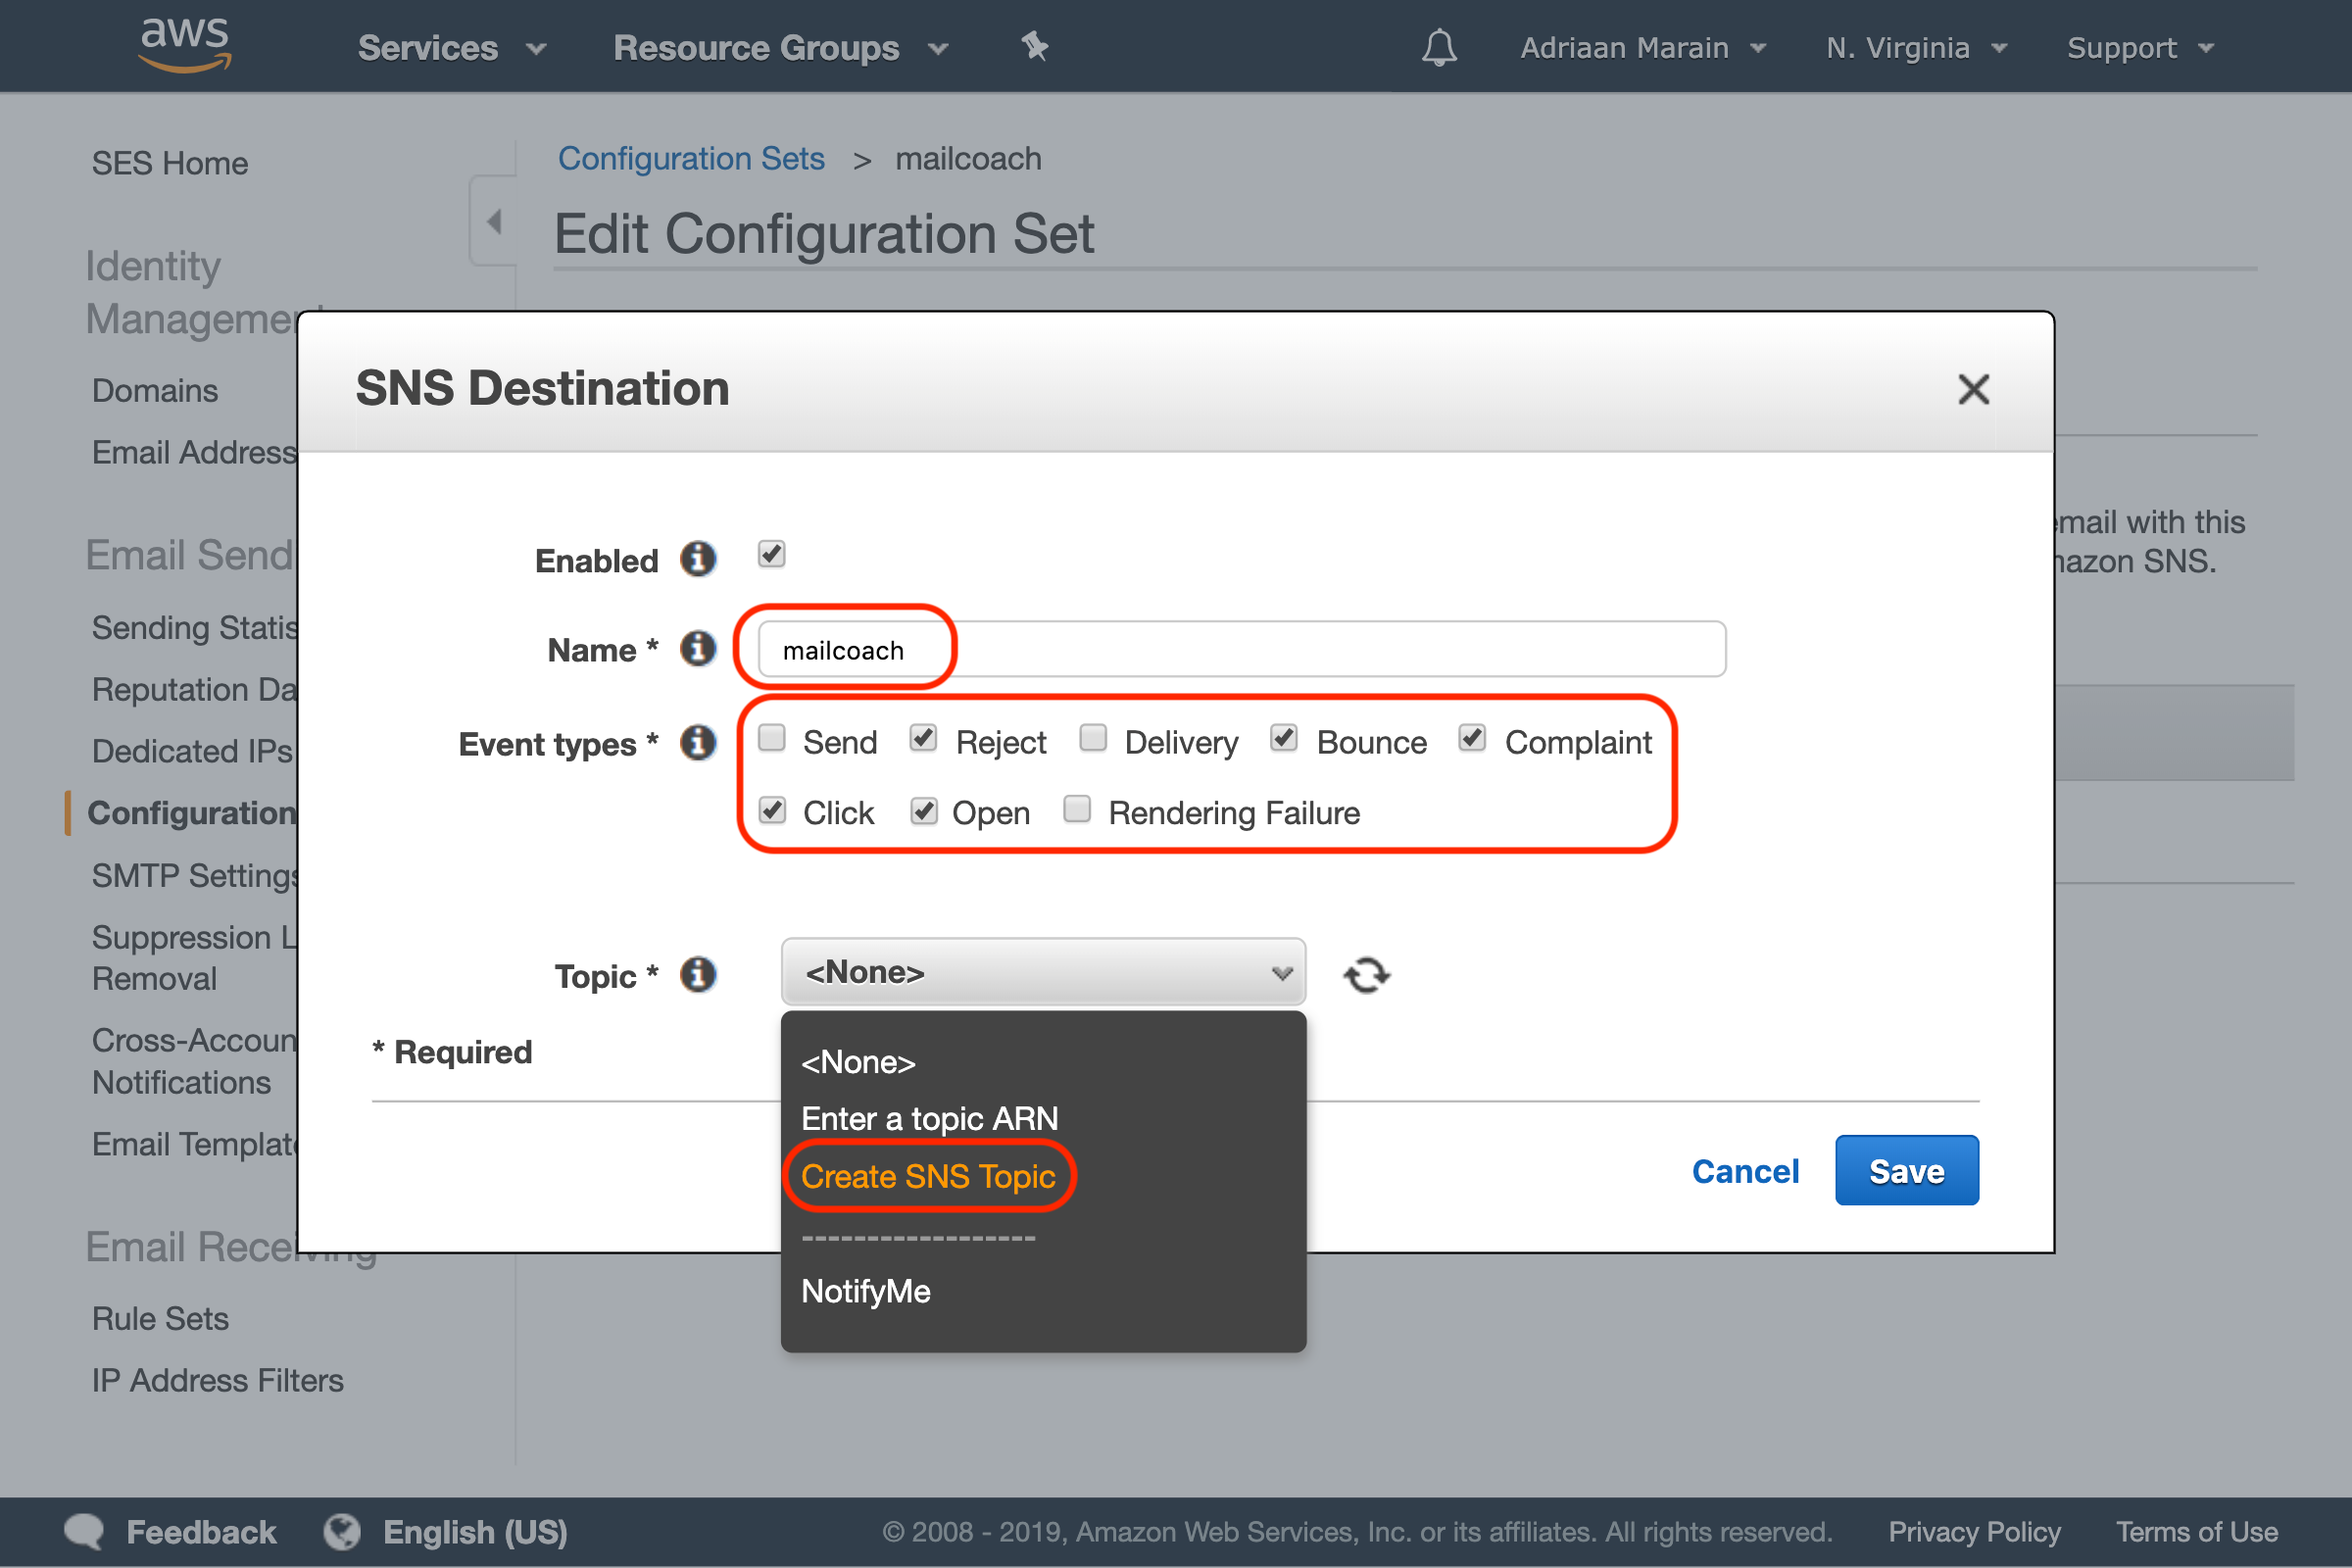
In the window that pops up, choose a name and select the following event types: Reject, Bounce, Complaint, Click and Open. Next, press the Topic dropdown and choose Create SNS Topic:
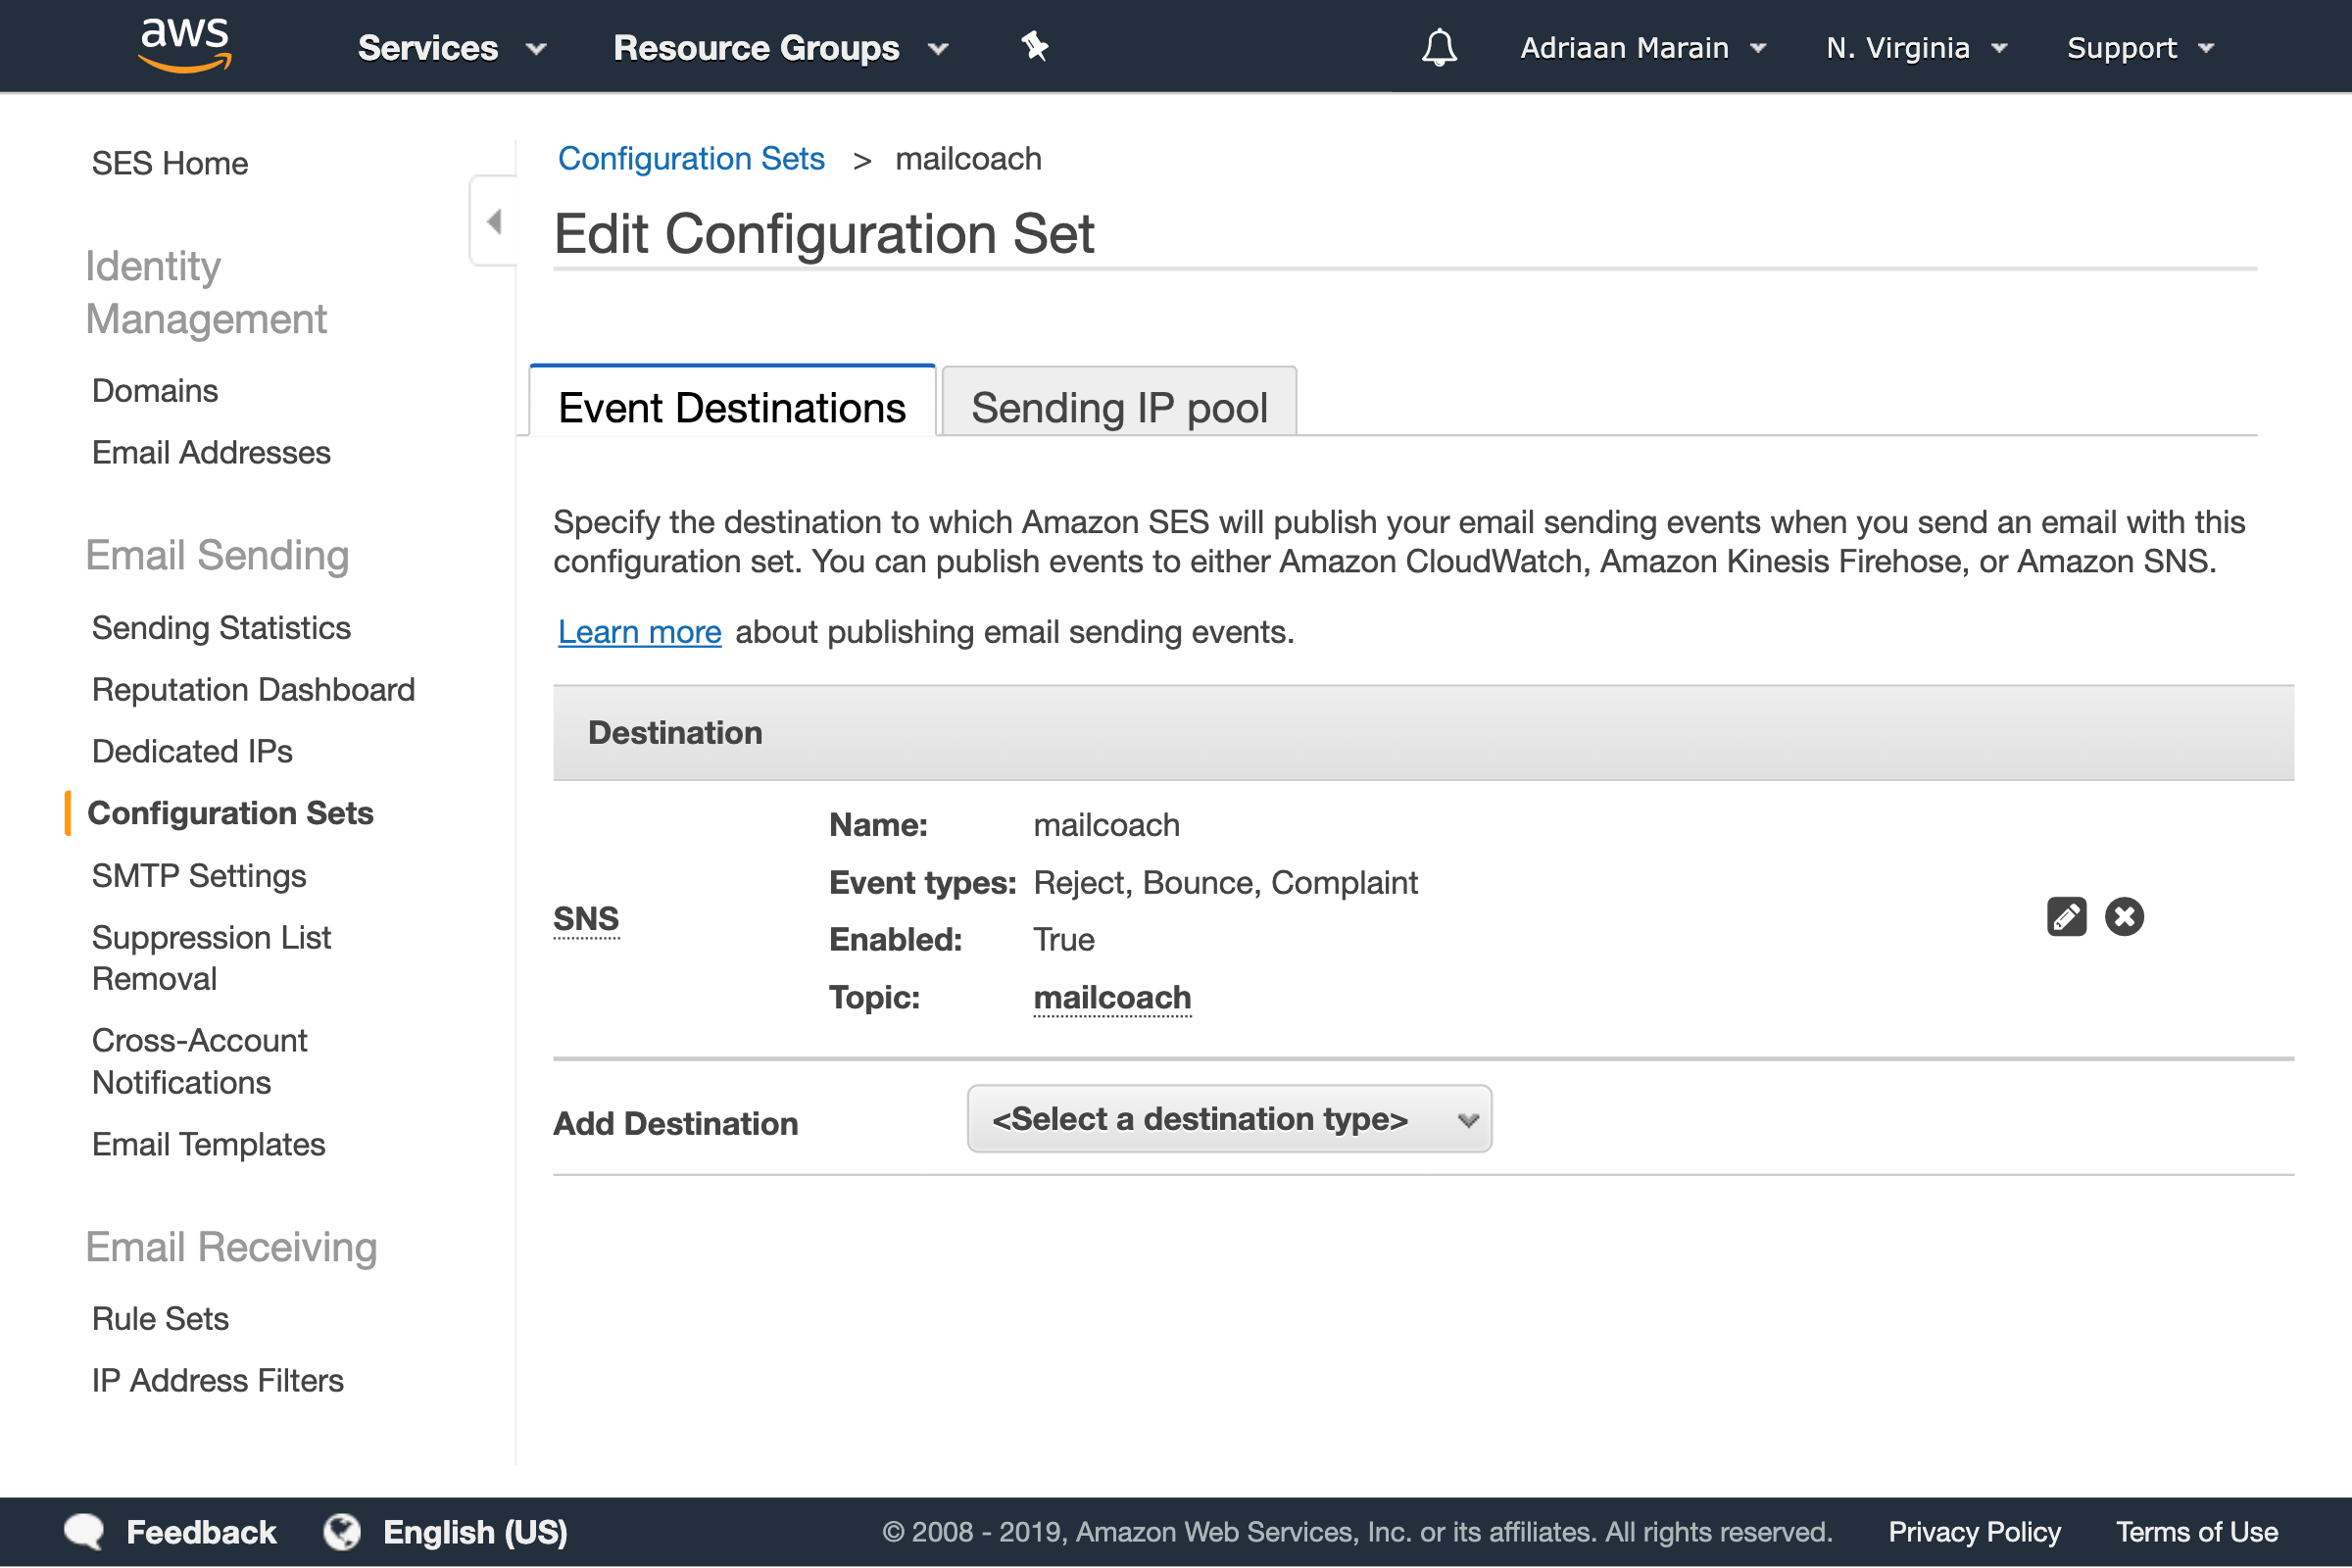
Another window will open, choose a topic and display name, press Create Topic and Save. You should now see your newly created Configuration Set:
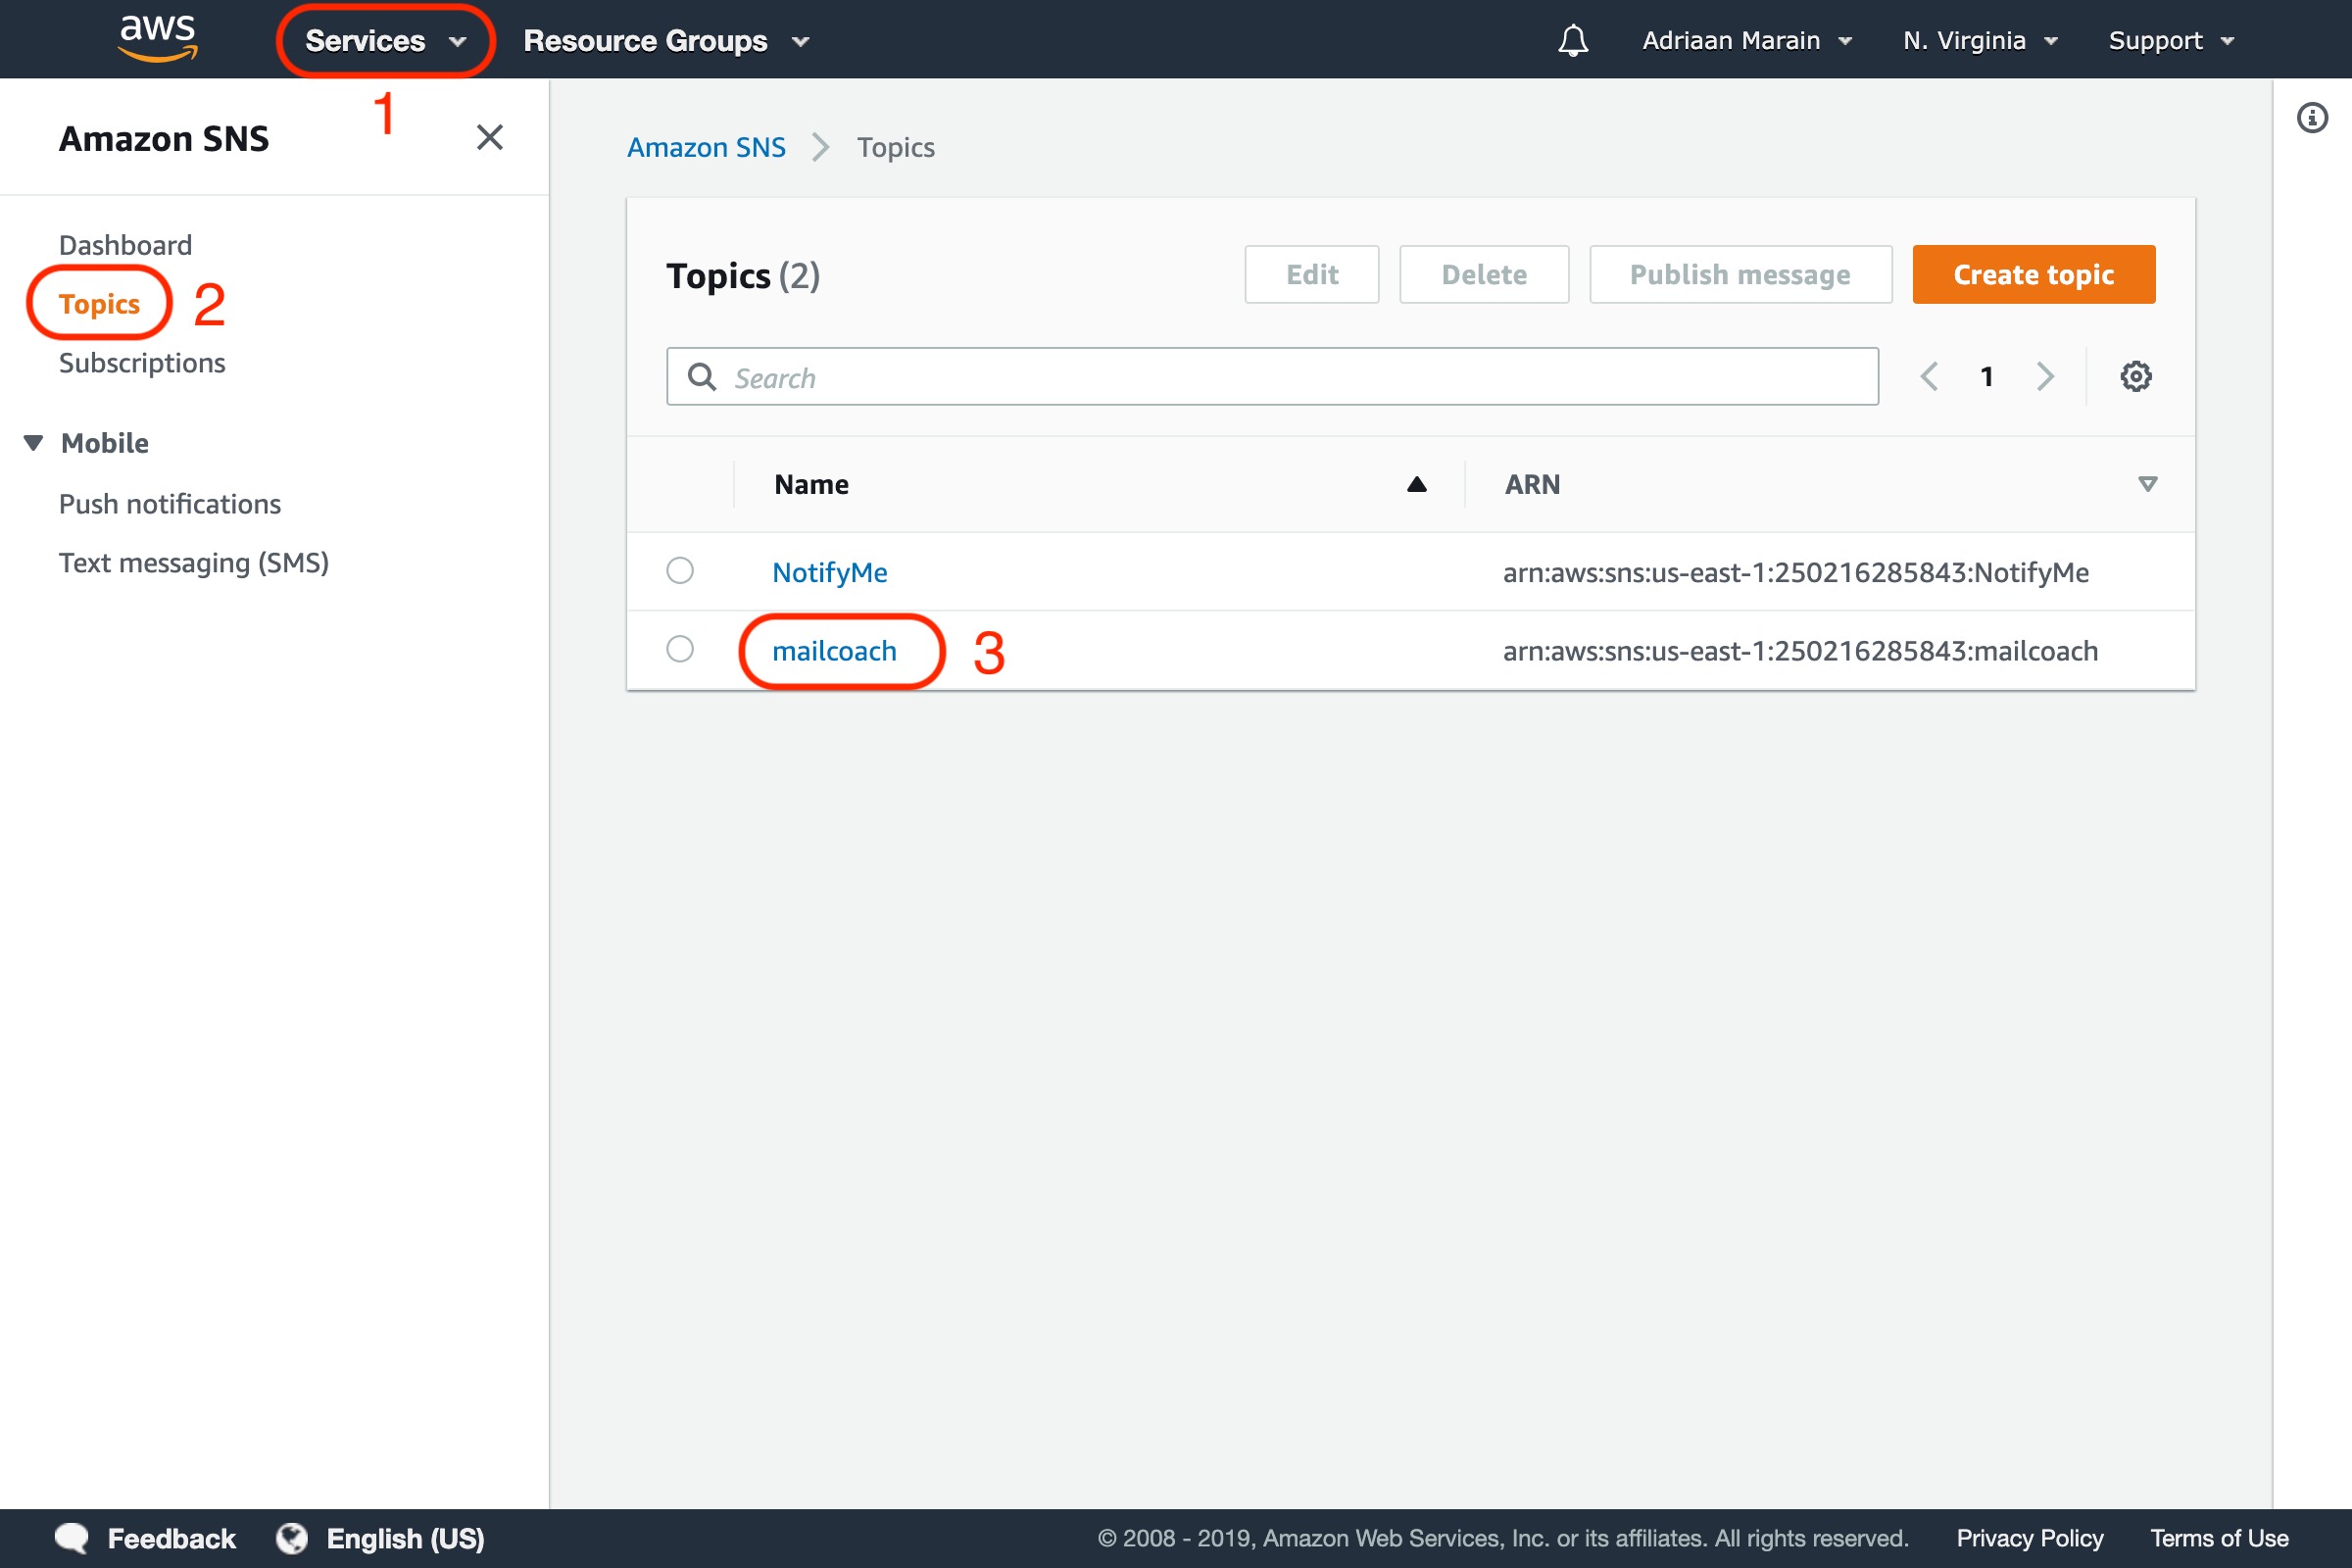
Now, go to Simple Notification Service (SNS) in your AWS dashboard to further configure the topic you just created. Open the Topics menu and select the topic.
Press Create subscription, choose HTTPS, and copy the exact feedback URL from this mailer’s Mailcoach setup wizard. Do not construct it from your team domain or reuse an old /ses-feedback URL; hosted Mailcoach no longer accepts that route.
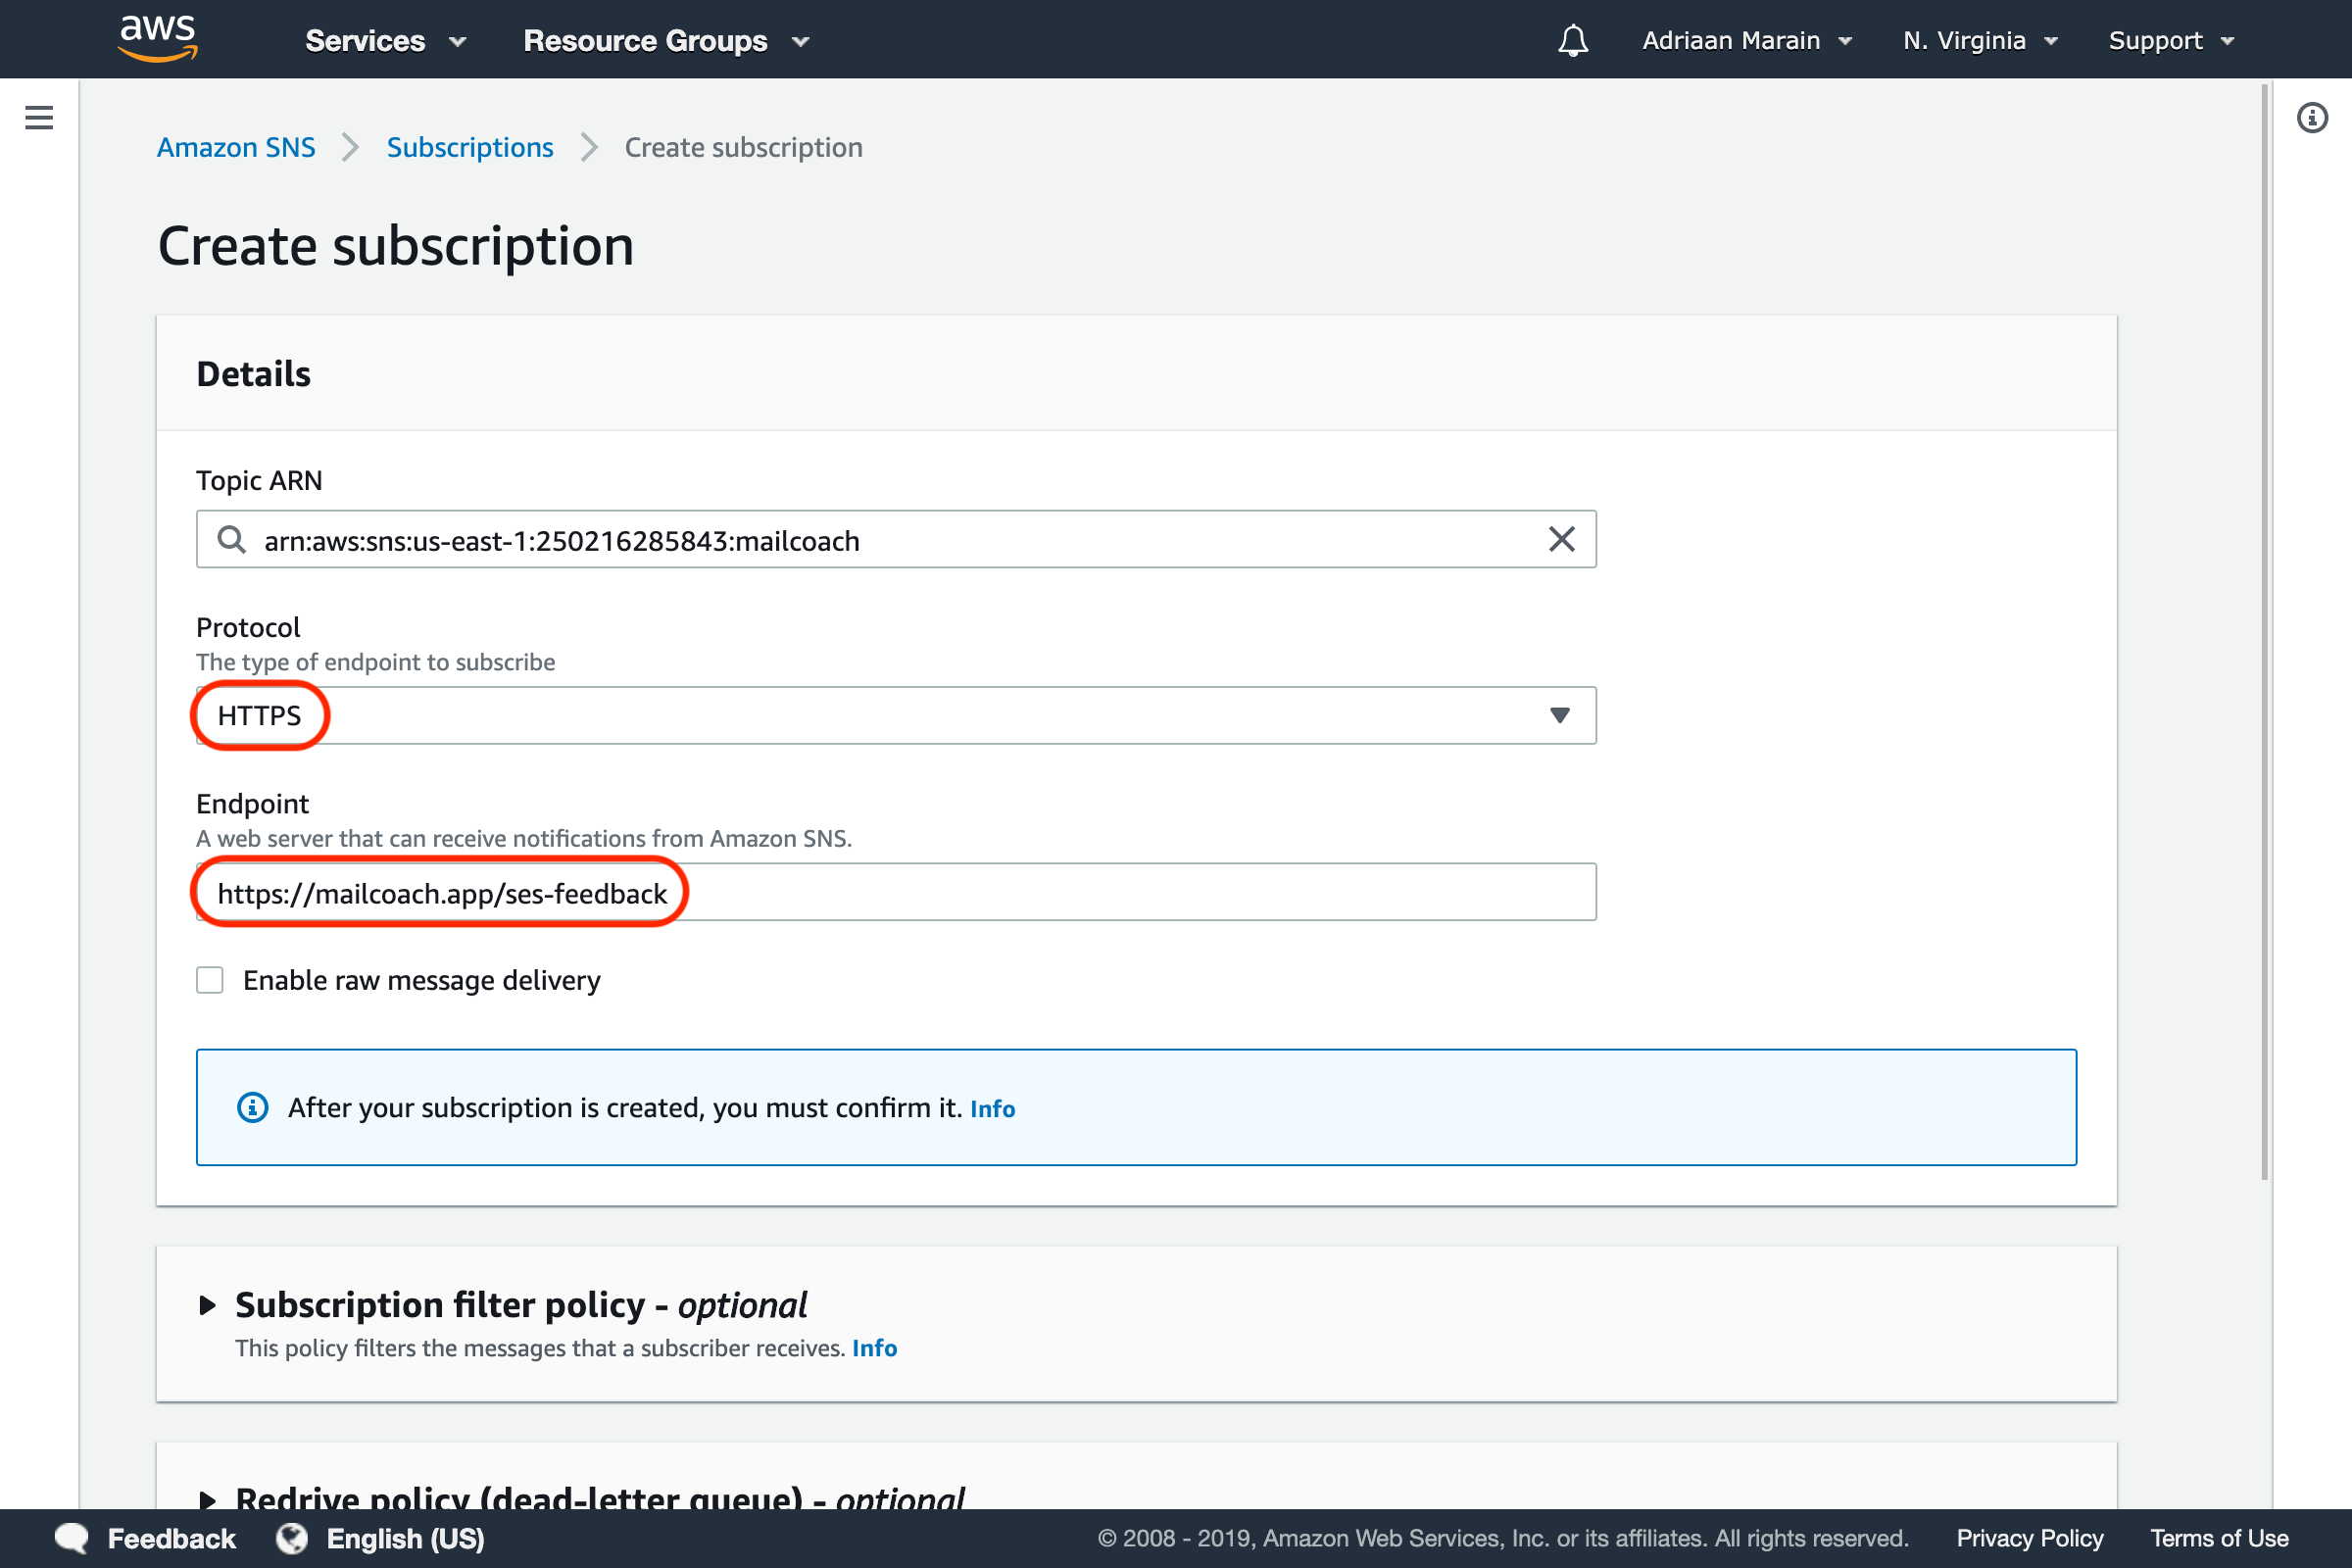
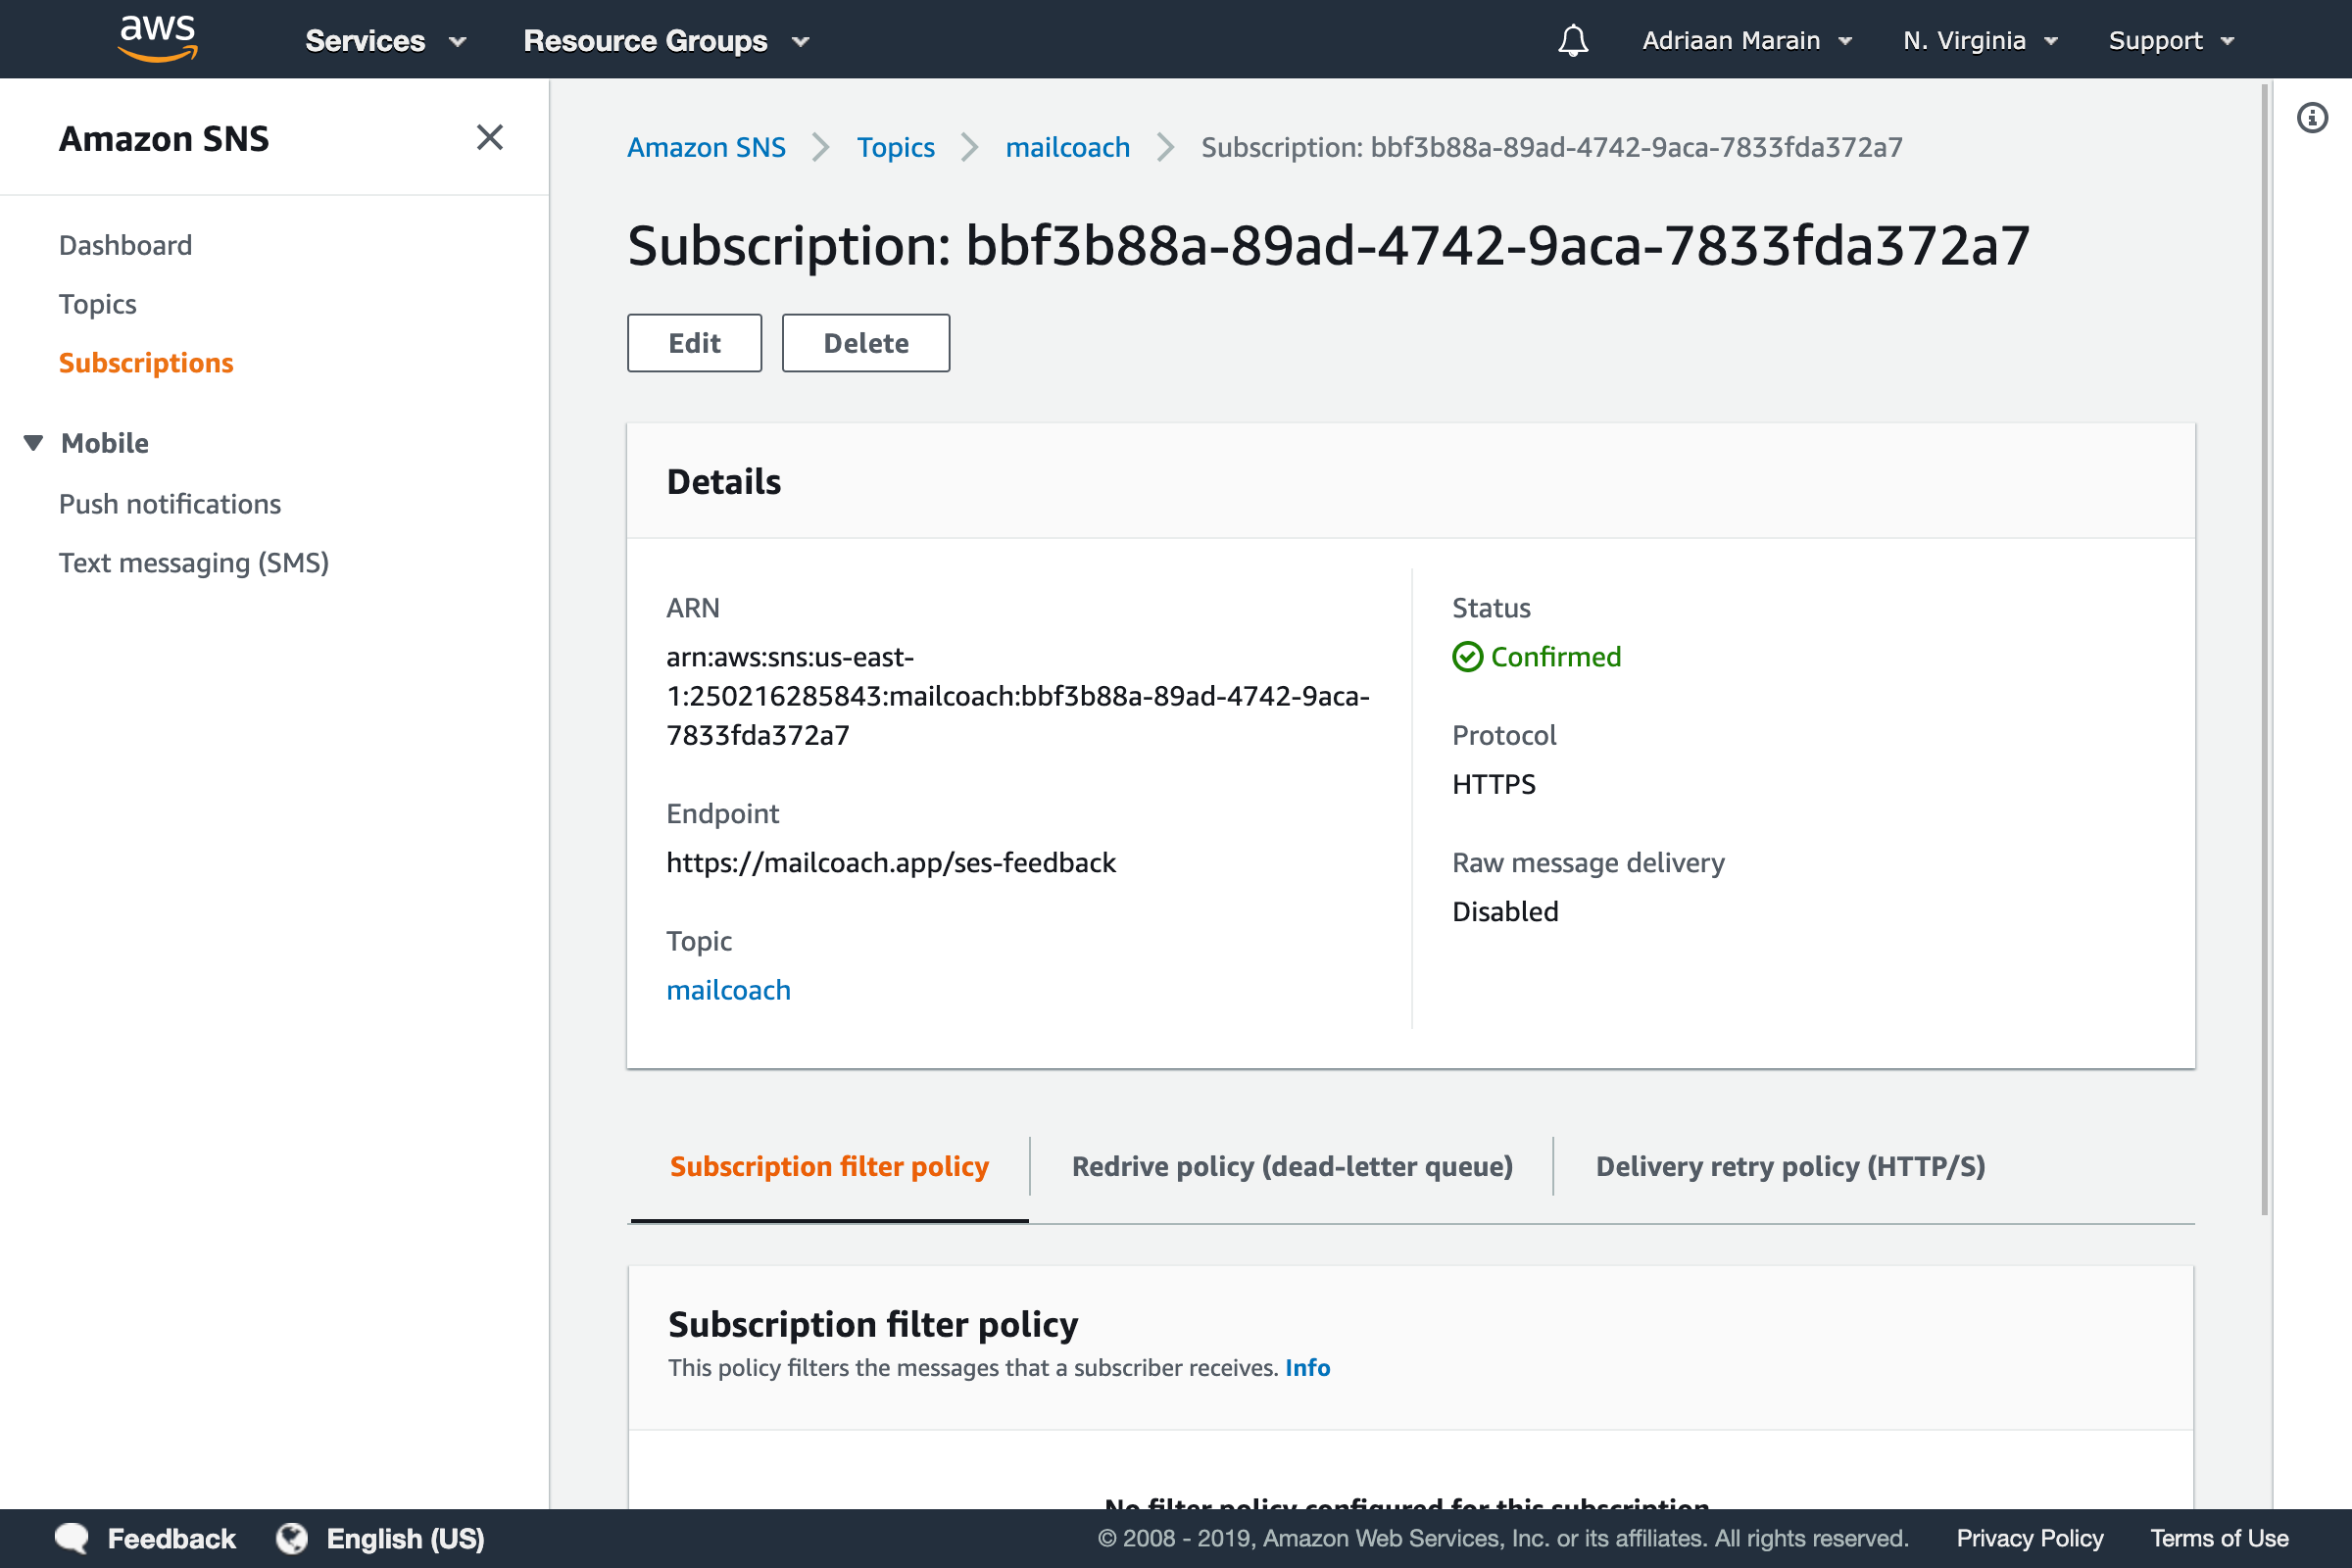
Scroll down and press the Create subscription button. If everything was configured correctly, the subscription should confirm itself and the Status should reflect this after a page refresh.
Send a test email and check your inbox and spam folder. If it lands in spam, review your domain settings.
Before sending to unverified recipients, request production access to leave the SES sandbox.