Mailcoach's mailer
Let Mailcoach handle delivery without connecting an external email provider.
On this page
Use this setup path if you want Mailcoach to handle sending. If you have your own provider account, follow Your own provider instead. If you have not signed up yet, create and verify your account.
Configure your sender#
Mailcoach creates a <your-account-domain>@mailcoach.cloud address you can use as a sender. You can also verify a domain you own.
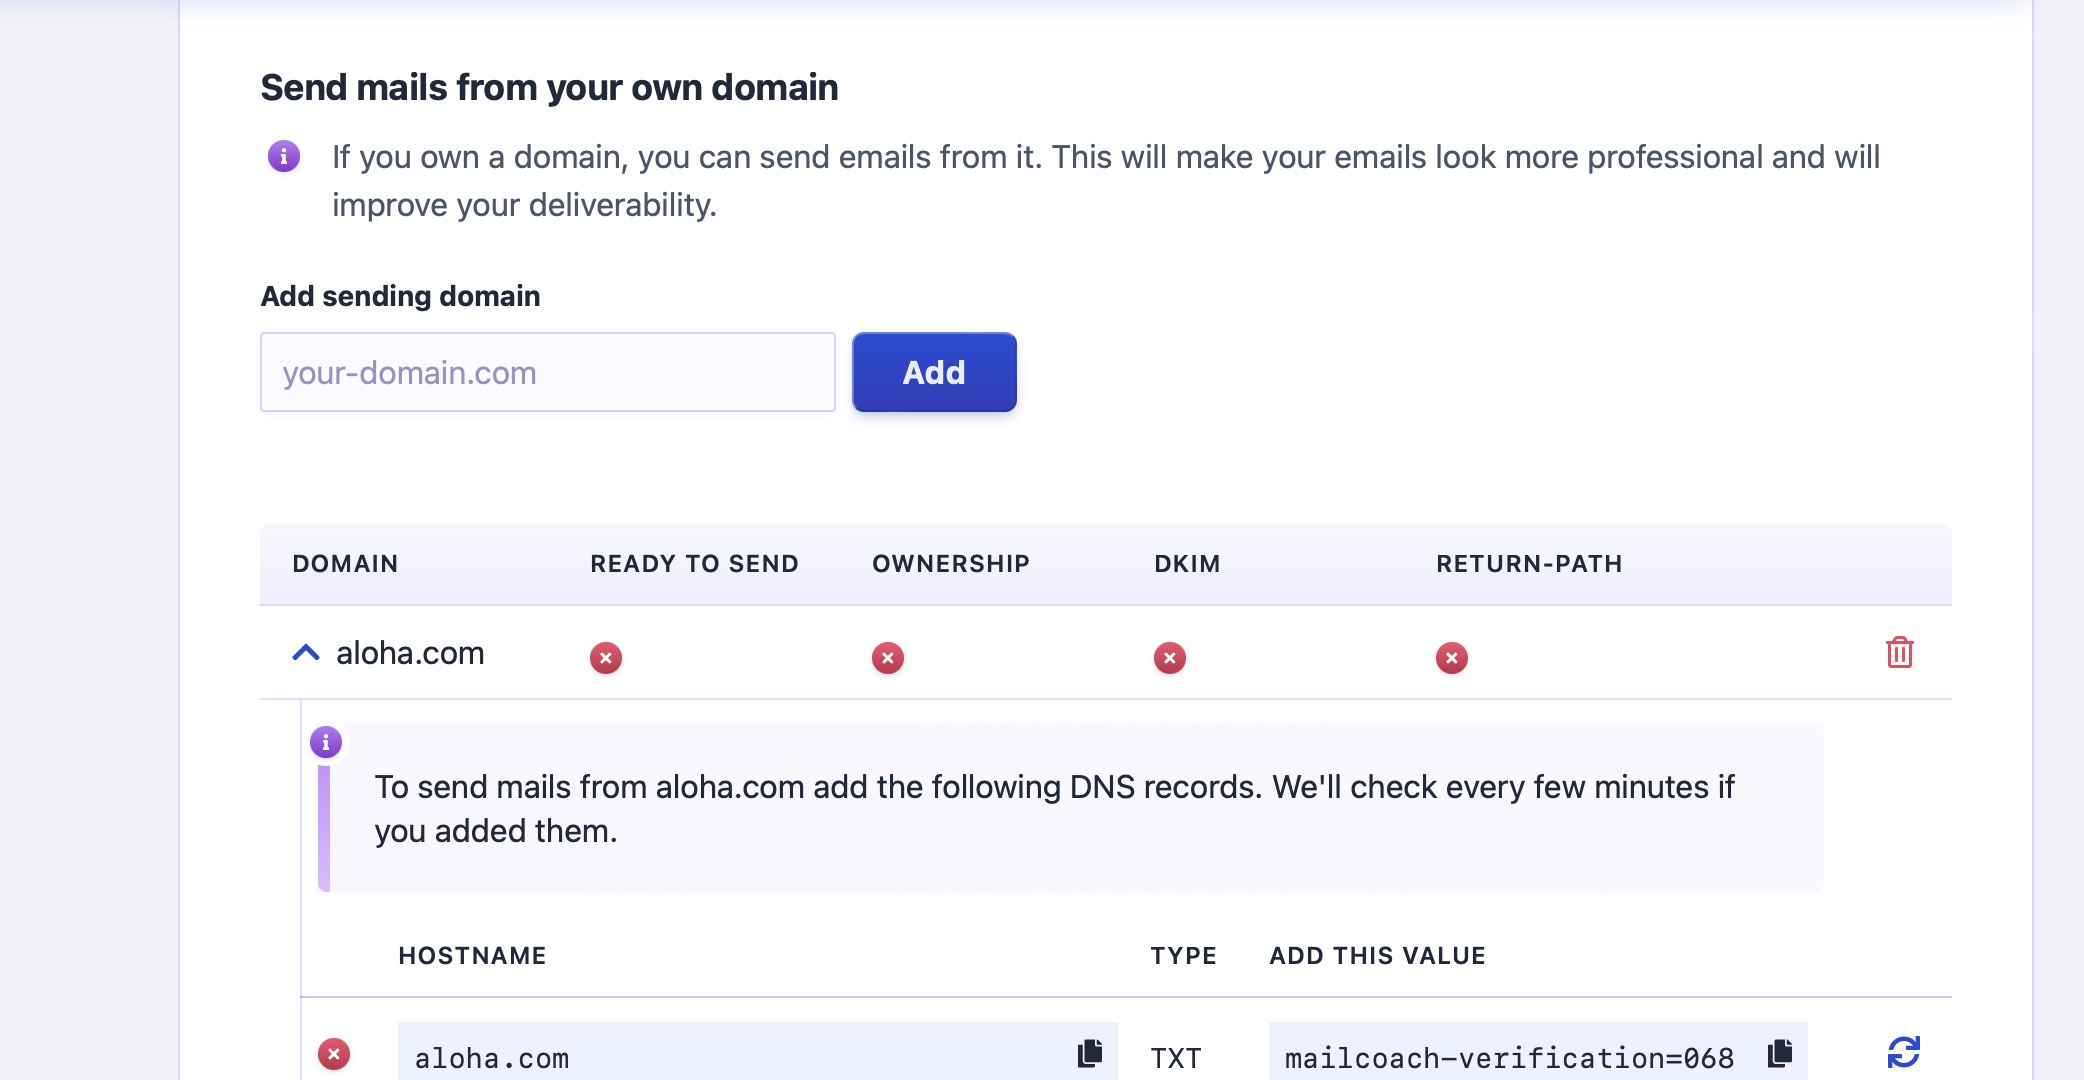
Under “Send emails from your own domain”, enter your domain and click “Add domain”. Expand its row to see the DNS records to add at your domain’s DNS provider. These records prove ownership and authorise sending. Wait for Mailcoach to verify them before sending from the domain.
Use “Send test email” to send to yourself and confirm the message arrives. Open and click tracking is optional and can be configured under Settings → Tracking.
Test mode and approval#
New accounts start in test mode. You can send and process email only to yourself, team members, or domains you have verified. This restriction is separate from the trial’s email allowance: having emails left does not remove test mode.
Use “Request approval” when you are ready to send to your subscribers. Until approval, keep testing with eligible recipient addresses.
Continue to your first campaign#
Next, choose an editor, then follow Sending your first campaign. That tutorial creates a list containing only your own address before sending anything to a real audience. You do not need to configure an external mailer as well.